Showing posts with label fabric. Show all posts

4.29.2013

{renovate} the depths of indecision

Sometimes I'm quick to make decisions and know precisely what I want. Other times, it takes me months and I second guess everything. The latter usually revolves around fabric and/or other textiles. It just so happens that I'm trying to choose a couple different fabrics right now. And a couple rugs. I need to choose fabric for over the kitchen sink. I also need to choose fabric for the living room ottoman and I need a rug for in front of the kitchen sink. Oh and possibly a rug under the table in the nook. Seriously, it's a lot! It makes my head spin. I know I want to have some fun with the fabric over the sink, so I'm trying to choose that fabric first and then base my other choices off it.

I know you're all curious, so here, my friends, is what indecision looks like:


I. CAN'T. CHOOSE. First world problems, right? I just want to pick one so I can move on with my life, but none are right. At the beginning of the kitchen remodel, I posted that I wanted to updated the color scheme be blue and green - instead of just blue. This still holds true. More recently, I posted a variety of fabrics, trying to narrow things down. The one thing I have decided is that I want a floral, because there are so many straight lines in the room - the cabinets, the tile, the painted lines on the floor. (My awesome husband pointed that one out ;) I need to both mix it up and soften it up. The problem here, though, is that a lot of florals read too stuffy.

The fabric below (left) is actually the closest to what I'm looking for. Chris loves this one. But I think it's maybe too turquoise? Although, the pattern is pretty awesome.


During High Point Market, I was drooling over browsing the #hpmkt hashtag in instagram and came across this fabric:

PERFECT. Do any of you know what this is? I asked the person who posted, but haven't heard back. I LOVE it. It's bright and fun, yet not too busy or precious or stuffy. If any of you know, or have a guess, let me know! :)

Friends, what do you second guess yourself about? Are you in the middle of a decorating dilemma right now?

1.28.2013

{inspired} kitchen fabric options

So, as for the kitchen remodel, we're getting so close to the fun and pretty part - decorating! Adding some color, some fabric, etc. The stressful part, though, is that I freeze and quadruple guess myself when it comes to picking out fabric. I am the worst at picking fabric - it takes me forever. And in this case, there are a lot of factors to take into consideration. Let me set the scene for you guys.

Because of the new couch, and yet to be shown new ottoman that will serve as a coffee table, we're mixing up the entire first floor a little. I'm looking for ottoman fabric (desperately needs recovering), kitchen window fabric and nook window fabric. Because everything is so open to each other, they need to coordinate on some level. I'm also trying to decide if the kitchen window fabric should match the nook window fabric to give in a cleaner look, but then I think it might be more fun to have a different fabric. See? Factors.

Our rug, which I love, is pretty traditional. The color palette in the rooms, as I talked about last spring, will be blues and greens. As a lot of you probably know, I'm really drawn to geographic patterns, which I think would balance out the traditional rug really well. Here's what I've been looking at so far:
 
I love them all! Oh, but there isn't a lot of green here, so I'm still looking.

A part of me also really loves soft florals, though. And I think they play off graphic patterns beautifully - when done well. My fear with these, though, is they can quickly escalate to granny. Granny is NOT the look I'm going for, but these fabrics can be nice:

It's a start, right? I'm sure we'll be talking about this more :).

Friends, how do you narrow and choose fabrics?

4.04.2012

{inspired} spring florals

One of my favorite trends so far this spring is the abundance of bright, colorful florals. I'm a sucker for when fashion swings more feminine -- I love dressing up in cute skirts and patterns. 

I'm pretty sure my husband, who is so cool about my decorating decisions, would not so much agree with bringing overly feminine florals into our home. So today I thought it would be fun to dream and look at some lovely spaces that do incorporate this fun trend.

I love this wall paper. It manages to be moody and feminine all in one. This would be an amazing retreat.

I think curtains are a great way to bring in a trend. They're easy to change up if you get tired of them and they bring so much personality to a room.

I love this girly vintage couch. It's so bright and fun. And looks so chic with the pink walls.

If you like this look, and think you'd like to try it in your home, I pulled together some fun ways products that let you bring the look into your home in varying degrees.


1. Floral curtains
2. Quilt
3. Floral ipad case
4. Floral heart print
5. Amelia Sofa
6. Amaryllis Measuring Cups
7. Garden tools

I actually own #6, and I LOVE them. They're such a fun way to bring a pop of color into a room. Currently, they're serving as votive holders on my mantle. I also would love to try #4 and #1 in my house. And, in my dream sewing room/craft room/huge walk in closet (not necessarily all one room -- we're dreaming here afterall ;), I would definitely incorporate #5.

What do you think about a florals? Do you have them in your home now? Would you bring them in? If so, which products do you like best?


3.16.2011

{inspired} spring wreaths

Once we hit March, I get a little antsy for spring to hurry up and arrive already. Spring in Oregon means lots of rain (shocking, I know), but it also means longer days, warmer temperatures, and budding flowers and trees.  *Love*. As you've probably figured out, our decor doesn't change much for the seasons or holidays (well, except for Christmas). But this year I have my sights set on making a spring wreath. I had so much fun making my Christmas wreaths, and I think a spring wreath could add a nice touch of color. I have quite a large *to make* file, so from there I pulled my favorite wreath inspirations that having been popping up on the interwebs lately.

I love this wreath's texture and fullness. I also like that it's super neutral, but you could change out that ribbon according to mood. Perfect!

I still completely love my holiday yarn wreath, and so making a bright fun one is top of mind. This one caught my eye because of the colors (yah blue and orange!) and the simple medallion, instead of flowers.

But, of course, I'm still loving the flowers too. Love this color combo.

This wreath of moss, branches and fabric flowers screams spring to me. So much fun texture.

This could possibly be my favorite. Oh who am I kidding? I adore all these. I like this rectangle shape though ... and these are all the flowers I learned from my felt wreath project. I would love to give this a try to practice these cuts more!

And, aren't these petals just the cutest? So much depth ... and so colorful!

What about you guys? Ready for spring?! :) What fun spring-related DIY projects do you have planned?


Edited: I just discovered the What I Love Wednesday link party, which is perfect for this post! Hop on over to view what everyone's loving today :).

3.04.2011

{create} fabric silhouettes

Remember how I tend to ignore trends? This is another instance. I love silhouettes.  I've just never figured out where I could fit them into our house. Until recently. Since I *finished* our bedroom, I've been looking for something to put above each of our nightstands. I just had no idea what I was looking for really.

I mean, technically, the bedroom was great! But for some reason those two spaces were really bothering me. So I decided to put silhouettes above each of our nightstands ... you know, to designate a *his* and *hers* side of the bed :).
So I whipped up these babies in an afternoon.  Silhouettes are usually made with paper, but I wanted to add my own spin on the traditional silhouette and decided to make them out of fabric. I love fabric and stitching and think it adds a little more dimension than paper. Plus it's a great way to use up fabric scraps.

And here's the same space after they're hung! I love it. And I can finally let the bedroom be *done*. You know, for now :). I am still thinking about curtains for the windows ... but that's a story for another day.

Want to know how to make your own fabric silhouette? I know the answer is YES! :)

First, gather all your supplies. You'll need: silhouette pictures, paper, fabric for the silhouettes, background fabric, thread, Wonder Under (this is a link to A LOT of the stuff ... you can find it at your local craft store for less quantity and therefore less expensive) or your favorite fusible web, foam core and frames.

First, take a side photo of your head. I blacked them out because I wanted to play in photoshop one day, but since you're actually transferring them to fabric it isn't necessary. Print and carefully cut out.

Next, take your Wonder Under and attached the fabric to the sticky side.  If you haven't used Wonder Under in the past, they actually give very specific directions on the roll for how to best use.  Next, trace your paper pattern onto the backside of the Wonder Under and cut out the pattern.  Take the paper off the back side of the Wonder Under and iron your silhouette to the background fabric. The Wonder Under is great. It keeps your two fabrics in place when you're sewing, and it keeps the cut edges from fraying. Fraying can be great in some projects, but you don't want something as intricate as a face fraying. You could chance looking like you have booger hanging out your nose. Bad news.

Next using a straight stitch, trace around the outside line of the head. I used yellow thread for the contrast. The best part of this is you don't have to use your sewing machine. I default to my machine, but I had to go so slow that it actually probably would've been quicker to hand stitch. Use whichever you're more comfortable with.

When you're done, you're silhouette will look like this. Except with your or your loved ones head, not Chris'. :)

And now for framing. Of course, I have 45 empty frames in my basement, so I grabbed two of the same size. Then I cut two pieces of foam core to fit the frame.

Then wrap your fabric around the foam core, as you'd wrap a gift. I've found that tape actually secures the fabric incredibly well. But, of course, now that I've discovered my staple gun, I'd probably use that next time. You know, just for fun.

Once up, I had a hers ....

.. and a his.

And art that adds a great amount of loveliness to our bedroom.

Thanks for stopping by today! I'd love to hear .... what are you up to this weekend? We'll be working on our girls and boys projects. Of course! :)

2.28.2011

{create} A Pelmet Box

Happy Monday friends!
Since I moved in, I've been debating what to do with the window above our kitchen sink. We painted the kitchen, we hung cafe curtains in the nook, but still I was at a loss for this window. The window lets a lot of light into the kitchen, but it just needed ... something.

At first, I was going to do roman shades. But, I wasn't sure I would actually ever close them. So what's the point? But without anything, it was just so .... boring. 

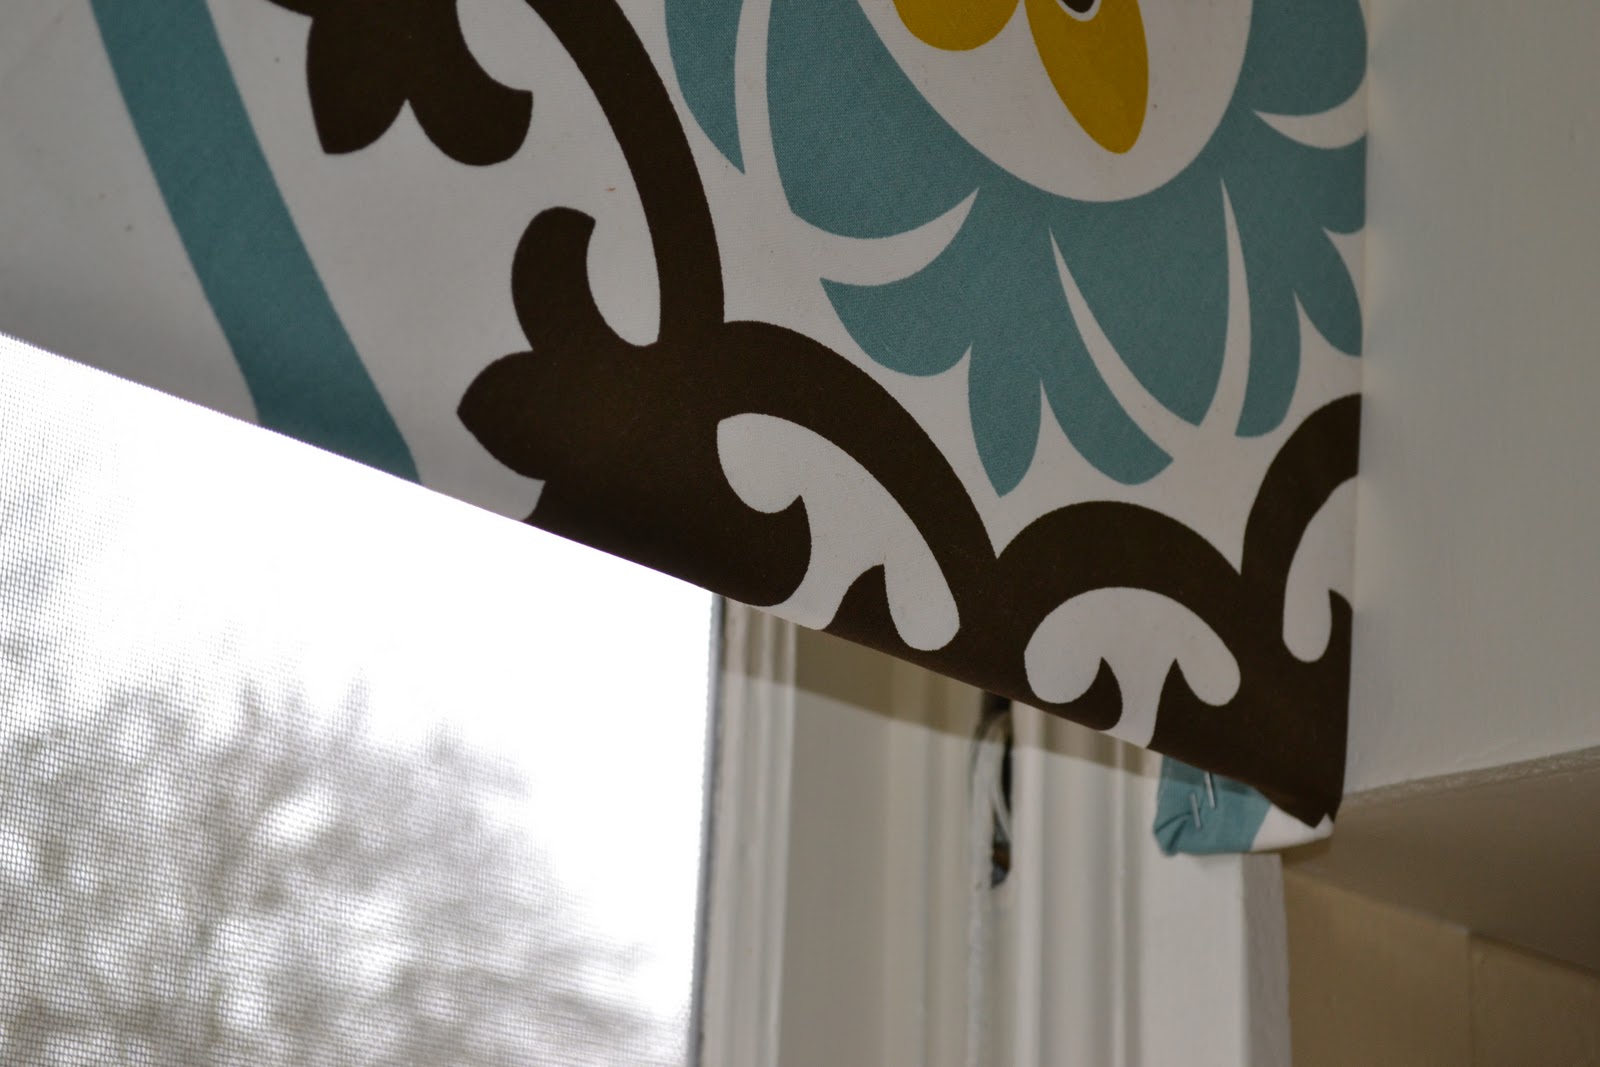
Then last year, Jenny at Little Green Notebook posted a tutorial for Pelmet Boxes. I knew immediately this is what my kitchen needed. But then I was stuck on fabric choices (And, now you see why all my projects take SO LONG!). Well a few weeks ago I found the perfect fabric in the form of a discounted table cloth at Target. Score!

So, only a year or so after the original spark of inspiration, I constructed my own pelmet box!

The bright fabric makes a world of difference in the space. It adds just the right hit of color, without being overwhelming. It dresses the window, without blocking light. And it adds a dash of fun that I think a lot of kitchens (especially mine before this!) are missing.

A huge added bonus is how easy this project was. It took about an hour and a half from start to hanging finish. And, in the process I learned just how empty my life was before I'd held a staple gun. Yah for power(ish) tools!

(Love fresh flowers! How amazing are Ranunculus? I love it when they begin appearing in the spring!)

I'm not going to give you a full tutorial, because Jenny's is incredibly easy to follow. You'll find the full tutorial here. One tip I'll add though: cut your side corners at an angle (see above). It bothers me a little that I can see a little of the corner peaking out from below the front. A simple diagonal cut would easily take care of this. And, I'll probably go back and do this for mine!

So tell me, what's something in your house that drives you crazy, but you're not sure how to fix? Or, has there been a time when you were stuck on a project for a long time and once you completed it you realized how easy it was?


Thanks for stopping by today! :)

ps. I'm linking up to Krafty's Kats link up party! Come check out all the other Krafty goodness here.

2.25.2011

{create} flower garland

Last week when I featured my new awesome letterpress artwork, a few people asked about the flower garland I have strung across the fireplace.

I was going to simply direct them to the post I'd written about it, when I realized I've actually never posted about that adorable garland! So today I'm going to give a quick lesson on creating flowers and garlands. The best part about this garland are these flowers, which are super versatile, fun and easy!

First, gather all your supplies. You'll need fabric (I usually use two to three different fabrics), scissors, thread and a needle.

Next cut out three sizes of circles, with four circles per size.

Third, take the largest circles and fold all four in half.

Next, over lap each half circle as shown above. (Not sure how to describe that without confusing everyone!) Last, using a simple straight stitch, sew all the sides together. I use a diagonal cross pattern. I've found that it secures a little better.

See all the great ruffles you get just from this first layer?

Not just repeat with as many colors and as many layers you'd like. Sew each layer together individually, and then sew it to the layers it'll sit on. The more layers, obviously, the fuller your flower will be.

I've played around with a bunch of different ways to make these. You can cut ridges along the outside to make it look more like petals. I also like mine really poofy. There are a few ways to get there. First, make lots of layers. Second, use heavier weight fabric.

Third, sew two circles together before you start layering. I really like this way because it  not only adds weight and dimension, but you only see the front of the fabric on each side (see above).

As you can see these flowers are very easily customizable. Once you have the basic shape, there are a million variations.

I think they'd be really cute as pins to brighten an outfit, or even as some sort of hair clip.

But, to turn them into a garland, simply sew as many as you'd like onto a piece of fabric, ribbon, or in my case twine. These tend to get a little heavy, so make sure you sew the twine or ribbon on the top half of the flower. It'll help the flower not look droopy on the garland.

Last, just hang where ever you need a little color and a little festiveness!


Thanks for stopping by today! Hope you all are having a great friday! :)

2.23.2011

{create} cake bunting

This weekend we celebrated a birthday! As you guys might remember, for each family birthday I make whatever cake the birthday boy/girl requests. This time the cake request was a white cake with chocolate frosting. So I got all crazy and made a 14-Layer Cake. Yum! I'm not going to go through the recipe (because I somehow managed to mess it up. Still good, but not right.), but if you follow that link, you'll find it.

There was cake everywhere for awhile!

Now, even though I host birthday parties, and bake lots of birthday cakes, I am the worst at having candles around. I think candles are so festive (!), but can't ever remember to buy them. So I was looking for something to liven up the cake a bit. Then a remembered a super fun project I'd seen over at Victoria's blog A Subtle Revelry: her fabric cake topper. 

Have you all been to Victoria's blog yet? Please go visit. She's an event and prop stylist with the most amazing diy party decor ideas ... which of course translates so well into home decor. She also has a great feature called *reason to celebrate* that features how everyday objects can actually be amazing festive. Her posts  inspire and make me smile every morning.

So, she created a cake topper and I thought I'd share my version with you.

First I gathered up all my supplies: straws, hot glue gun, ribbon and fabric. I was worried at first because we don't have kitchen skewers (and I didn't want to go the store!), but then I remembered the red and white straws from our Christmas party. Perfect! And they set the color scheme for the bunting.

First I tied, and then hot glued a piece of fabric to both straws.

Then I cut strips of fabric, long enough that I could fold them over the ribbon. I also cut out little triangles as well to add more of the traditional bunting effect.

I folded each piece over the ribbon, hot glued them to stay put, and had myself a festive mini-bunting.

Then I simply stuck it in in the cake. This project took me all of 10 minutes, all with materials I had on hand.

And, it upped the cake's festive-factor 100-fold. I'm actually rethinking my stance on candles after this. I think every cake should have a fun bunting adornment.

Victoria also have a very detailed and great tutorial here.

So tell me, what's your favorite way to top a cake?