
Happy Monday friends! Did you all have a great holiday last week? I ended up taking most of the week off and was SO productive! Can't wait to show you what we accomplished :). But today I have a fun update that is very non-kitchen related. YAH! I feel like life has been consumed by our kitchen remodel, so it was nice to tackle something else - just for fun.

Young House Love and Bower Power are hosting their quarterly Pinterest Challenge this week, so I decided to paint the interior of our front door! Some of you might remember a couple months ago, I wrote a post about potentially painting the interior front door (okay, in January. Sigh). We looked at a lot of beautiful inspiration photos. You all were so encouraging, but I was nervous and then there was a kitchen and .... yeah. I have no idea why I was so nervous, because the change is AMAZING.

I went with a deep, deep navy blue. Black Ink from Benjamin Moore, specifically. It's the same color as the two doors in our back porch. Friends, our living room is a completely disaster from the kitchen over-flowage, but even completely unstyled it make a HUGE difference and I already love it so much.

So, how exactly did I go about painting this?

1. Remove everything from the door -- curtain, curtain rod, handle and deadbolt. Everything. And then fill holes. Use a basic wood filler putty, fill the holes and let them dry. Easy. I filled the curtain rod holes, but not the handle and deadbolt because we were using the same ones ;).
1a. A close up of the removal. The yellow in some places is the hole filler working it's magic. I opted to keep the vintage door bell in place because I was worried I would somehow break it. I just applied some tape to the edges and called it good.
2. Sand. Especially if you used hole filler, sand to get all surfaces smooth. I didn't do a lot of sanding here - just a 60 grit on the hole filler and a 150 grit quick and lightly over the rest of the door. Clean. Make sure your door is spotless before you start painting. I used a little TSP and it worked really. Let the door dry before you start painting.
3. With a paint brush, fill in the edges. I actually locked myself in doing this (don't ask! ;), so the random line down the right side is where I was worried a roller would be too close to the trim. If you leave the door open though, you don't have to worry about this.
4. Fill in with a small roller. So easy! Let dry. Repeat. This door took two coats.
5. Also, I've previously posted tips and tricks about painting high gloss doors. It's worth a read if you're thinking of tackling this project.
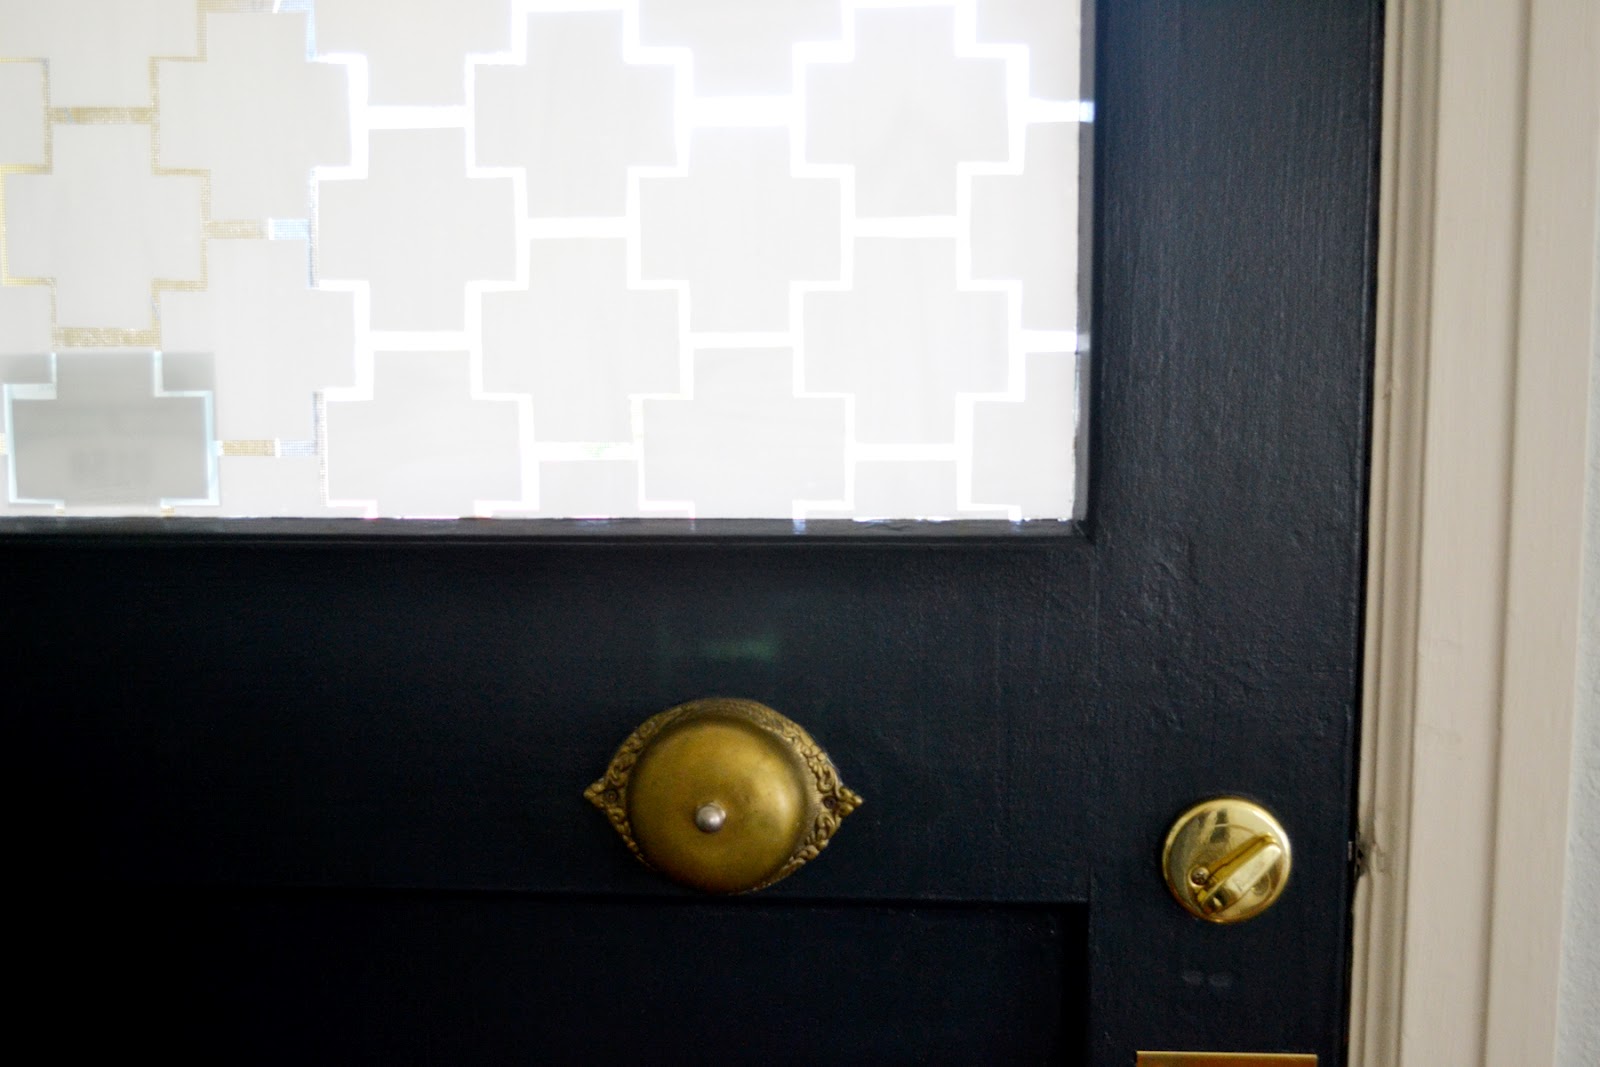
A couple things. First, this project total took a couple hours. Such an easy weekend update project. Second, I've always hated that our door fixtures are brass. But, we've never taken the plunge in replacing them because all our doors have brass fixtures. $$$$. Against the navy blue though? I don't so much mind the brass. Hmmmm. And third, yes, I had some fun with the window "covering". You can read more how to create you own decorative window film here..

A little styled. Even though in reality that is the world's most awkward place for a table! :)
What do you all think? I'm so excited to put this room back together and see the door against the furniture and other decor!
If you'd like to see my previous Pinterest Challenge entries, they are: DIY ombre pillow, a mirror quote, a DIY capiz pendant, and a DIY twig pendant.
If you'd like to see my previous Pinterest Challenge entries, they are: DIY ombre pillow, a mirror quote, a DIY capiz pendant, and a DIY twig pendant.


Yes! I'm so happy you went for it, its beautiful! Doesn't it make such a huge difference! Love. And I was thinking to myself that I wanted to comment how much I like the brass hardware against the new color before I even read the part you wrote about it! Yay for quick projects with such a big effect:)
ReplyDeleteWow, love it! A great way to bring a bold color into a room
ReplyDeleteYour door looks awesome! Isn't it amazing what a dramatic colour looks like? We did a charcoal grey on our back door and I love the graphic punch it gives the room. I especially like your brass hardware against the Ink!
ReplyDeleteWow...it looks great! I actually LOVE the brass hardware against the blue...reminds me of something nautical. Yay for another project completed! Way to go, girl;)
ReplyDeleteLove it and I agree about the brass hardware. Looks great now! I am totally inspired and I think I'll be doing this to my boring white front door, too! :)
ReplyDeleteAmazing. I think the black is absolutely perfect and dramatic! Can't wait to hear about what you did with the window.. I want to do something similar:)
ReplyDeleteYes! So so beautiful. And I'm kinda crazy about the brass!
ReplyDeleteThis looks awesome Jenn - I thought maybe that photo I saw on Instagram was a door but then the stenciling/window covering really threw me off. But how cool! Looking forward to reading more about that - that gives me an idea for our back door.
ReplyDeleteLooks so pretty!
ReplyDeleteI love it!! Can't wait to find out how you did the window covering...I have a weird interior door with window situation that is crying out for something like that!
ReplyDeleteLove it - This is my first time here & I'm subscribing. :)
ReplyDeleteLOVE!... Everything about it! You already have an amazing door, and they sure don't make them that beautiful and unique anymore. Love the color and what you've done with the window. Cannot wait to see all of the end results!! Such a good feeling. Congrats and well done on the progress! Hope you are well, Whitley
ReplyDeleteDon't you love it?
ReplyDeleteI painted the interior of the front door, living room (french doors) and kitchen door - red. We went with Almost Charcoal (dark blue grey - just a bit lighter than yours - for the hallway doors.
I'm amazed at the difference it makes.
I wish my door had a window like yours. I really like the frosted pattern.
SO pretty, love the black. before our new door I went from white to black and it made a huge difference!
ReplyDeleteThat looks amazing!! The color is perfect and definitely breathes new life into the brass hardware. That doorbell is amazing, btw! :)
ReplyDeleteOmg!!!! I am 100% in love with your door!!!!! The deep, rich navy is a perfect choice and the frosted glass stole my heart!!!!! I've been dying to frost the glass in our master bath... I think you may have given me the push to do it!!!!
ReplyDeleteLOVE the new door! Looks so classy!
ReplyDeleteThat looks amazing!!
ReplyDeleteGorgeous! And I'm so looking forward to your post on how you did the glass... I have a back door with several glass panes in it that could use some love and updating.
ReplyDeleteIf we weren't renting I'd love to do this to our front door. Yours looks amazing!!
ReplyDeleteJenn... the door is beautiful! Can't wait to see how you did the window detailing. ~Danielle
ReplyDeleteLooks amazeballs! The navy really makes the brass pop. It look like jewelry for the door :)
ReplyDeleteI love it! You did an amazing job. I love that color and your door bell.
ReplyDeleteAwesome! Going to go paint my door now!!! Thanks for the inspiration! :)
ReplyDeleteThat looks great! If I were allowed to paint my apartment door, I would totally do the same thing.
ReplyDelete~em @ small girl, big world
You have totally inspired me to go for a dark interior door in a light room! Love it!
ReplyDeleteGreat job on the door. I am always afraid of painting a door a color
ReplyDeleteHa we just did the reverse! Since we ended up painting our entry way dark blue, we actually re-painted our door from a dark blue to a light gray! The dark blue and dark blue was too much for the space. Now I need to make a curtain like the one you have in your original picture. Too funny.
ReplyDeletelooks great! and its not an awkward place to put a table but actually a great place to drop your keys upon return home!! the plant is a nice touch too.
ReplyDelete