Showing posts with label kitchen. Show all posts

3.11.2013

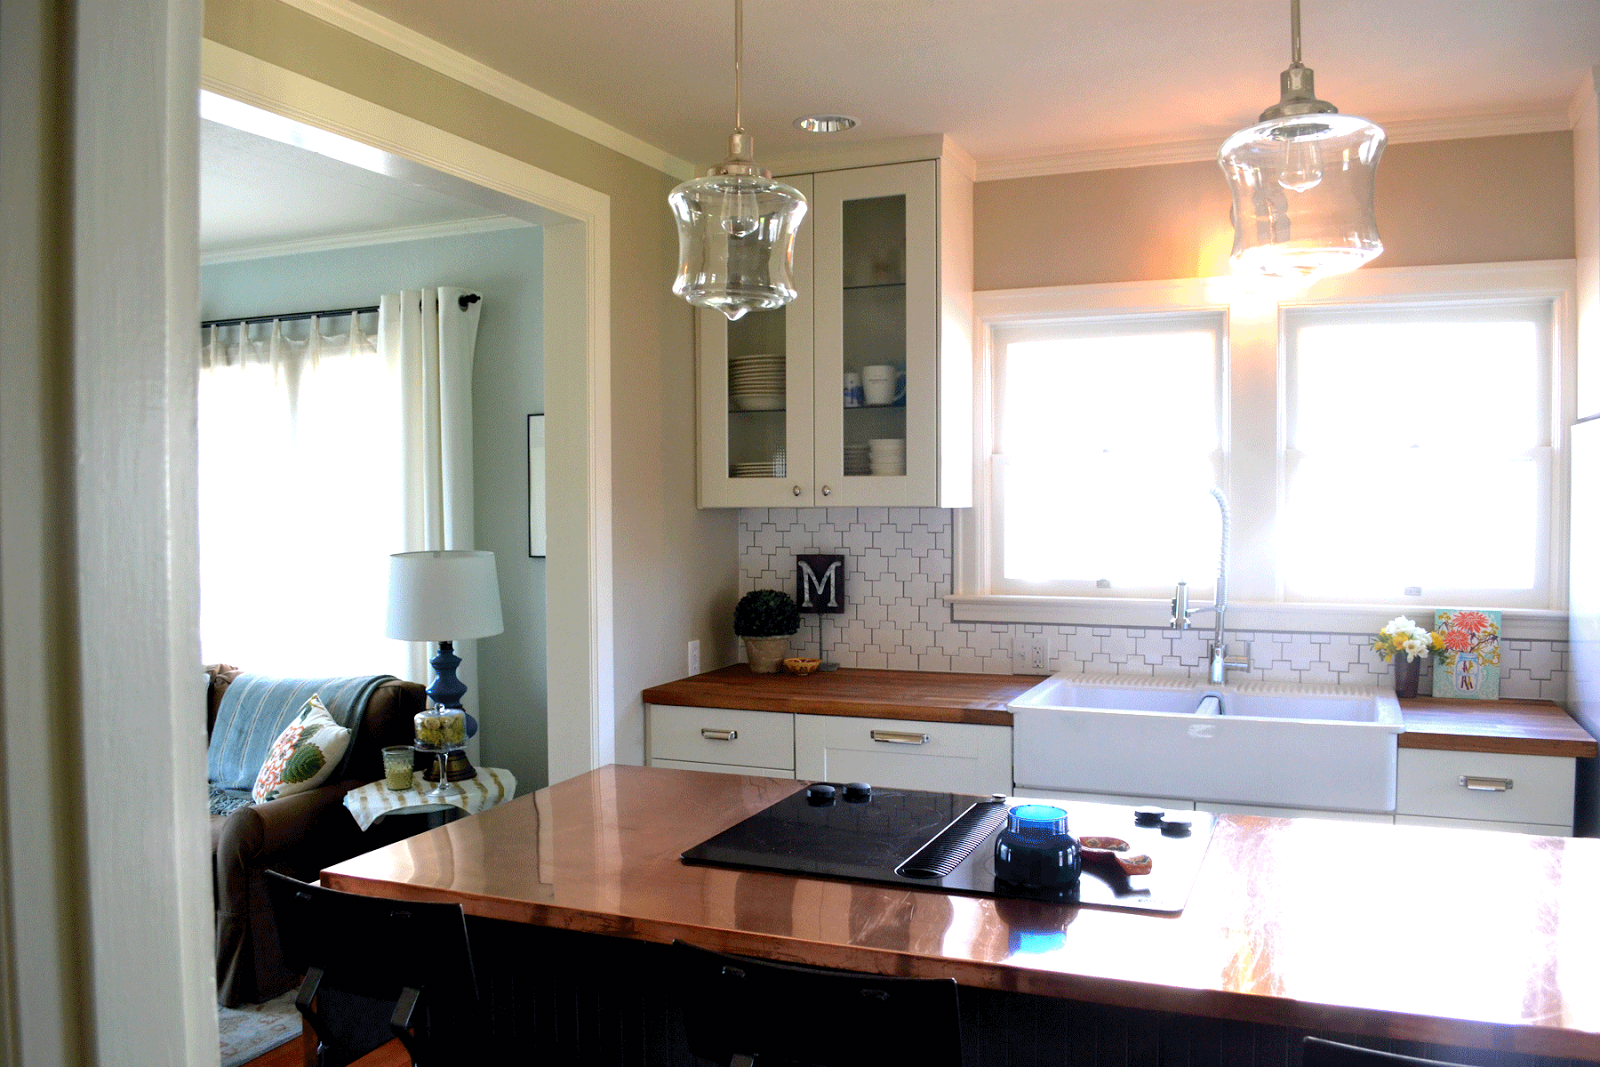
{renovate} kitchen REVEAL!

Friends, today is the day. I'm declaring the kitchen remodel done! As I mentioned in my last update post, there are still a few things left to do. But nothing on the list effects either using or looking at the kitchen, so I'll just update you when we get to them :). 


There are a couple things I need to mention before I get to a slew of before and after photos. The first is, we've been working on this kitchen since last memorial day. Just over 9 months. And I am so grateful that you guys were so patient and supportive and encouraging through the entire process. Thank you for understanding that we have jobs and we take vacations and we have other things that take up our time. I so appreciate you for still showing up and loving on our remodel! 

Second, I really need to publicly thank my awesome rock-star husband. Chris gave up so much in the last 9 months to get this project done and I know I don't thank him enough. Thanks, love! :) Most of you probably know that Chris bought this house way before he ever met me, and I just adore that he never bats at eye at my crazy schemes and I absolutely love that through each project, this house has really becomes "ours." Okay, end sap.

So, let's look at some photos! The befores are all from my original post detailing why on earth we were gutting the kitchen, instead of just updating :).

Taking down the wall between the living room and kitchen was definitely a game changer.


As is the island!


I was nervous about removing the cute original built in, but I so love having a wall mounted microwave/oven now. And, it saves us a lot of cabinet space.

And, here are a few photos from the nook:


Below are some more photos of the space, for your viewing pleasure. I took a ton over the weekend! I'll be back Wednesday with sources for everything. Friends, thank you again for following along through this huge process! :)


I'm sure it's obvious, but wow am I glad we're done!! :)

1.23.2013

{renovate} kitchen backsplash and counters

Well, if you follow me on Instagram (jennmccormick), you know that over the long weekend we tiled! Specifically, the kitchen backsplash! But along with tiling, we also got a few other major things done. On a very related note, we seriously have the most amazing friends. You know the friends that way-back-when helped us renovate our back entry and refinish our hardwoods? Those are the same friends that helped demo the kitchen and built our cabinets? Well they came over this weekend specifically to tile and do whatever else we still needed help with. I cannot even begin to tell you guys how grateful we are that they're in our lives -- and how much we'll owe them when they buy a house :).

Backsplash

We have a backsplash! And oh does it change the look of the space!


The tile is Ann Sacks Swiss Cross. I am so in love. Because it's such a small space, we wanted something that had personality, but was still neutral and classic. I think this fit the bill so well.
 
I didn't take a lot of photos of the process, because I was actually tiling! The girls tiled while the boys did other stuff. It was my first time tiling - and it was actually pretty easy. The hardest part was figuring out the pattern so we could begin.


Up next will be grout - hopefully this weekend.  But FIRST we need to decide on what color grout - white or gray. I am so torn! Any opinions, friends?
ps. You can also see that we installed window trim after the last post about trim :). Much better!

Counter

First, the counter top extension! We've been planning this since the beginning. We couldn't plan the island to be as long as we wanted - for clearance reasons - but, we really wanted it longer than the space logically allowed. Enter, the extension. It can go up when we need it, down when we have a lot of people over and need the space. We still need to install the piece that moves it up and down, so that's next.

While the girls were tiling, the boys were adding the extension and gluing down the copper.


Making sure it's a tight, solid fit :). Yep, there was a rolling pin involved.

The boys also did some ducting work, which I'll show you later. But really, it isn't all that exciting, but is really nice to be getting done!


And this guy? He was our supervisor for the day :).

All in all, a very productive weekend. It's going to take me quite awhile to finish up and paint all the trim, but I'm getting so excited to share final photos with you guys!

12.17.2012

{renovate} a nook makeover

Happy Monday friends! How was your weekend? Full of fun holiday activities, I hope. I think we're long overdue for a kitchen update, so today we're going to take a look at our nook!

We didn't do much to this little room off the kitchen -- it didn't get demoed. But, since we're updating the kitchen, it got a little makeover as well. New ceiling (the old one was cracked), new moulding, painted floor, painted walls and painted ceiling.

Remember the old room? Very yellow .... which is never bad, but I was a little sick of it. 

And here is is today!

Here are the built in shelves, before. And a glimpse at the ugly old linoleum :).

And after a coat of bold and sassy navy blue paint. Both the ceiling and the shelves are Benjamin Moore's Black Ink, which is the same color as the inside of the front door. Even though I usually paint ceiling flat, I went with an eggshell so the light is reflected off the ceiling -- I completely love it. I sort of did this on a whim one weekend -- trust me, we have so much to do with the kitchen, that I didn't really need to add to the list -- but I'm so glad I took the time to do it.

Want to see a few more photos?


 Just a few more things to do this room, including:
- base moulding
- small rug
- curtains
- new chairs -- I'm already on the look out for something a little smaller

As for the rest of the kitchen, Chris is busy installing trim. It's looking so good! I'll be back with more of that soon. 

Have a great day friends!

9.26.2012

{renovate} a lesson in kitchen lighting

I had an interesting lesson in lighting this weekend that I thought I'd share with you all. We had our electrician wire recessed lighting in the kitchen and needed to actually install the cans and lights. Have you guys ever tried to pick out lighting at HD or Lowe's? It gave me such a headache! The display has about 50 lights, all turned on and you're supposed to pick your favorite. I couldn't tell the difference and they hurt to look at after awhile! So, we brought a couple different options home to play try.


The top one is 85 watt soft light. The bottom is 65 watt day light. I was completely shocked at the difference between the two.

The Phillips -soft light - actually turned the walls GREEN. Ew.

The Ecosmart - daylight- kept the walls the greige they're supposed to be (they look a little on the pink side in this photo, but that wasn't the case in real life).

I know you're supposed test paint under different lights for this reason, but I didn't think about it reversed. We needed to test light for the paint we chose! :) We talked to our electrician and he actually recommended the day light as a more true-to-light option in rooms. So, your quick tip of the day is that the type of light bulb plays a huge difference in the colors of your home. If you have a color that is off a little, try a different bulb. It might actually make a huge difference! 
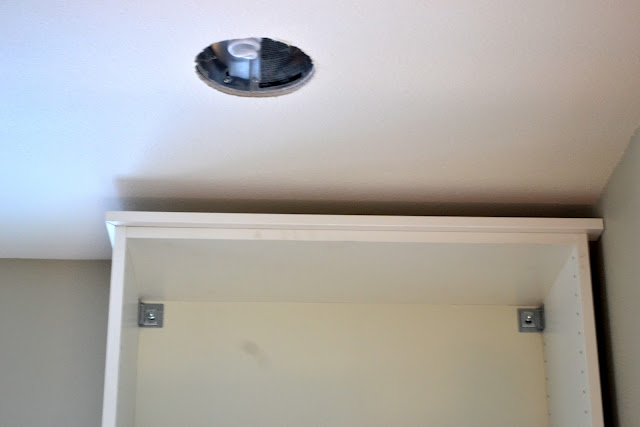
For more information about our kitchen lights, here's the post about our lighting plan.

9.12.2012

{renovate} kitchen update: sinks and islands

I feel like we're making some big progress lately, which is nice after have made so little progress for so long. This weekend friends came over to help (the same awesome ones that helped us assemble our cabinets on the 4th of July), and we got so much done!

Sink and Faucet

First, we officially installed both our sink and faucet. Our dishwasher and garbage disposal are also hooked up to the water -- but they still need to be wired before we can use them. We're close!

I am completely in love with this sink. It's IKEAs DOMSJO (no idea how to umlaut!) farm sink. We went with the 36" version and it's so awesomely huge. It's also solid, heavy and feels like really good quality ceramic. I'm completely in love. Oh, did I already mention that? :)

The faucet is Danze's Parma faucet, which we ordered from Lowe's. Isn't it amazing?? You might remember it from my original kitchen moodboard. At first I was a little surprised by how HUGE it is, but it the scale is actually quite perfect for the big farm sink. They live together gloriously.

The nozzle lives for the most part in the little arm clamp (right). But it also comes out and moves any direction. Love.


At this point though, for me, the most exciting thing is WE HAVE WATER! Seriously, not having water in the kitchen has been the hardest part of this remodel, by far. It's never bothered me that we lost the stove and oven. But, not having water in that room for three+ months? Saying it bothered me is an understatement. Anyone else who has been through a kitchen remodel -- do you agree??

We had a plumber come over and hook up the faucet, garbage disposal and dishwasher. Friends it took about an hour. That's the best $85 dollars I've ever spent. And, I'm pretty sure that figure included a couple parts.

Kitchen Island

Next, we also installed our island! Which means that ALL the cabinets are officially installed!

Instead of going with an standard IKEA island, we installed three IKEA base cabinets together to make a custom 6-foot island. Our stovetop will go above the middle cabinet.

For now, we have a piece of plywood serving as the counter. We did this for two reasons. First, we want to use the island! But, most of all, we're trying to decide how wide we'd like our overhang. We cut the plywood to the largest it would be -- a 12-inch overhang. I think it's too much though. Anyone out there have thoughts on island overhangs?? Is there a standard? I'm thinking for the width of the island cabinets, an 8" overhang would look more to scale. We're trying that next. :)

The chairs are from World Market. They were also on my original moodboard. I LOVE them. But, sadly, they're bar height, and we need counter height. So, back they're going. Sob. I have to start my stool search again. And tips on affordable, counter-height stools ... that are awesome?

We created the base the same way we created the rest of the bases, but from this angle, it looks quite skinny and almost unsteady. We'll be bulking it up just a little and bringing the base out so it's flush with the cabinets on three sides.


It's coming together! Once we finish the floor, tile, finish the trim, hang the cabinet doors, install the island countertop and install the lights we'll be done. So, you know, by next weekend. HAHA! :)

I do want to thank you all for hanging in there with us through this remodel. I'm sure you know it's taking us longer than originally planned, but you all have been so encouraging and I'm loving sharing our updates. Thanks for all your kind words friends! :)

9.06.2012

{renovate} kitchen trim: installed.

Friends! How's your week going! As is typical of any short week, my days are completely off. I thought yesterday was Tuesday :). On the positive side, though, I mentally gained a day! 

Over the weekend my rock star husband passed on an opportunity to go to the beach and instead stayed home to work on the kitchen. (And insisted I go to the beach ... so sweet! :) So I thought I'd take a minute to brag update you on what he got done!

For the most part he worked on trim. Remember in my last update I was explaining how IKEA cabinets don't actually reach the ceiling (below) and this is annoying to me?


Well, someone commented on that post and explained that all IKEA cabinets are like that to take into consideration uneven ceilings and walls. Hmm. Makes sense! They aren't custom and so they need to be easy for everyone to install and they need to fit every room. This is a concept I totally understand because even with professional drywall, our ceiling and walls still aren't straight.


But, even though I understand, I still don't like. So Chris installed trim. I am loving it so much!


Please keep in mind that these are install, only: no caulking, no holes filled, no paint. But, even so, I think they're starting to look so good, and more custom. Yah!

He also installed trim around the ceiling in the rest of the room.


So pretty! Just imagine how great it'll look once we caulk, fill holes and paint. Progress, friends! No we need the doors and window trimmed out and trim will be done. I have to give Chris mad props. He is completely self taught at wood working and he does a truly spectacular job. So, it's taking a little longer because he's learning a TON as he goes along, but the finished product looks completely professional -- if not better :).

The other thing he finished up was the floor. When we removed the wall between the living room and the kitchen, we had a big hole in the hard wood where the wall was.


If you recall, this isn't our first time tearing out and replacing hardwood floors. In fact, in the find of the century, Chris located a bunch of original Douglas fir floor boards in a TRASH pile at a house renovation site in our neighborhood. With permission, he snagged a bunch for projects like this. Not only does it match perfectly, but it's ended up saving us a lot of money in the long run.


So much better! It's a little weird right now with the floor boards facing different directions, but with what we have planned, it'll end up look great. :) Also, the sink won't be on the floor after Saturday! Keep your fingers crossed for us that both the sink and dishwasher will be installed then. We've had to reschedule with the plumber a couple times and I am very anxious to have water again! After that's done, we'll install the island cabinets, which means STOVETOP! 

I'm excited and I feel like we're getting close :).