11.30.2012

{create} diy paper mache tray


Happy friday friends! Well, this week sort kicked my behind -- sooooo busy! So today I thought I'd share with you a quick DIY using paper mache! Did you ever do crafts with paper mache when you were a kid? I remember making this paper mache bead necklace when I was younger. It was all bright colored and crazy. I sort of wish I still had it :).

Last week when I set up my Thanksgiving table, I created a paper mache tray to use as a centerpiece. It's one of those great items that I can see traveling around our house. It was gorgeous as the centerpiece, above, and it looks great on our mantle, top photo.

I think it would also make a great corral for keys, phones, etc.

Paper mache is pretty much impossible to mess up, but above is a photo step-by-step. I started with a piece of wood, lots of newspaper and modge podge. I wrapped the wood with foil, because I was worried about the modge podge sticking to the wood and it worked great. The foil separated from the newspaper perfectly. Then I cut up strips of newspaper and started gluing them layer by layer to the foil-wrapped wood. I glued the first layer, let it dry for about 15 minutes and then kept adding layers until I was happy. I think I ended up with about 10. I let it dry overnight and then popped it off the wood. I trimmed the sides with scissors and painted the inside gold and the outside blue. Done! :)

I love quick, easy and inexpensive diy projects, don't you? :)

Have you ever created something with paper mache?

Have a great weekend friends!

**Update! I'm linking this post up to Beneath My Heart's November link party! 

11.28.2012

{renovate} maximizing pantry space

Friends, let's talk about food storage today. Also known as .... the kitchen pantry. We finally have one! Let me preface this whole post with a renovation warning: we didn't quite think this through before we started. We KNEW we were going to lose some storage and we talked in the abstract about making better use of our hall closet, but it wasn't until we wanted to move all the food out of the living room (ahem) that we realized we had no where to put it. Cue confused frowny faces.

First, let's take a look at what we started with. On the left was our previous pantry. It was technically a built-in-turned-pantry, but it worked well. I cleaned it up and painted it a couple years ago. On the right is that same space now. That new wall? It's the back of our built-in oven. I think we'll still put small (tiny!) shelves back in for books, but for the most part this space is unusable -- well except for storing coconut water, popcorn and crackers. You know, the essentials :).

Next let's take a look at the most poorly used space in our entire house. You know how when you read articles/blog posts about small spaces the main piece of advice is to MAXIMIZE your space? Well friends, we live in a small space and the above photos are a prime example of NOT maximizing our space. A generously-sized hall closet - directly across from our old pantry - that was mostly used as paper bag and vacuum storage. (Oh and this space is the most awkward space in the house to photograph -- sorry for the weird angles throughout the post!)

And mop and aprons. :) Clearly, there is a reason that this space hasn't been featured here before! But we knew it was the perfect space for a new pantry. Since Chris was really busy with kitchen stuff I couldn't really help with - like, wiring - so I thought I'd "help" by clearing out the closet, painting it and getting it ready to add shelves.

Except THIS mess was what I came across when I cleared it all out. Old, crumbly lath and plaster.
Want to see a close up of that hot mess?

Boom. Chris had some choice words about my "helping," when I broke it to him that I actually needed his help :). Because we had three choices: 1. patch (ugh). 2. demo and sheetrock (ugh). 3. cover up that big ugly mess (hmmm).

Choice 3 won! So, we covered thethaff with beadboard, painted and hung new shelves. I went with the same white/cream as all our house trim (Miller Paint: Whip). It looks a tiny bit yellow in these photos, but that's because I had construction lights blaring at it. Because the closet doesn't actually have a light, so I wanted the space to be as light and bright as possible. The closet floor was painted the same color as the kitchen floor. The shelves are a closet kit from Lowe's. It was so easy -- we brought in our measurements and they cut the shelving to length on site.

And friends, it's like a whole new world! Those people who say you should maximize your space in a small house weren't kidding -- it makes such a difference!

All our food fits, with room to spare (!).

All our small appliances! Our vacuum and mop were moved downstairs with our other cleaning supplies. Our paper bags still have a home in the new space :).


While I was painting the whole thing (by the way, I still have paint in my hair -- a week later!), I decided to add a chalkboard to the inside of the door. I had some chalkboard paint on hand already and it'll be a great spot to make a note when we run out of something.

The whole process was so quick. It took us about 6 hours to remove everything, hang beadboard and hang the shelves. So you know, quick in the grande scheme of the whole kitchen remodel! And, it allowed me to take back my living room! YAH! It's the little things.

Friends, have any of you retrofitted a badly organized closet? Any fun pantry makeovers? Are any of you not maximizing your small spaces?? :)

11.26.2012

{celebrate!} post no. 500 and a giveaway

The timing of this post could not have been more perfect. My 500th post happens to fall just after Thanksgiving -- giving me a most serendipitous chance to thank YOU, my readers and friends. 


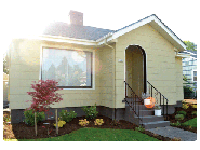
I started this blog on June 12, 2008. I was 3 months from getting married and moving into the adorable bungalow we live in today, except at that time is was not-so-adorable. I'd discovered blogs like Design Sponge and Decor8 while hunting online for wedding ideas and was immediately hooked. On a whim I decided I wanted to create my own blog. I thought it would be the perfect way to keep us accountable for all the house projects we needed to do -- and as you all know by now, that list was long!

After a couple years of posting every once in a while and not really putting myself out there at all, in October 2010 I decided to create a posting schedule and really jump in with two feet. From there I haven't looked back. I put myself out there and people started visiting here and I've been so thankful for the wonderful online community I've found myself in since then. Thankful for YOU. For those of you who visit each day and leave comments -- you make my day, you challenge me and you inspire me. For those of you who visit each day, even if you don't comment -- I know you're here and thank you for visiting :). For all my friends online whose blogs I visit each day -- thank you for continually inspiring me to create a gorgeous and welcoming home. Each one of you brighten my days and endlessly inspire me.

I thought it'd be fun today, on my 500th post, to take a look back at some of the more memorable projects here at A Home in the Making and if you keep scrolling, I also have a fun thank you gift at the end. 

Most monumental project: Painting the fireplace

 You thought I'd say kitchen, right?? :) I actually chose the fireplace because it was a huge undertaking to convince Chris that painting the brick would be okay. It felt like a really big hurdle for us as a newly married couple. He wanted to trust me, but this was his house and I came in and wanted to make some really big changes. He was really against painting the fireplace, but once it was done he LOVED it, and started trusting me when I was making what seemed like wild and crazy suggestions.

Most proud of: Kitchen

You knew it would be here somewhere! Even if it isn't done, it's by far our biggest undertaking and I already love it so much. I'm so proud of not only how well it's turning out, but how well Chris and I've worked together as a team to get it done.

Biggest surprise for my husband: Stripey hallway

Remember how, just two paragraphs above, I said I had to talk my husband into a project? Well, somewhere along the way I just started taking on my crazier ideas when he was out of town. The striped hallway was one of these -- he came home from a long weekend away to quite a change :).

Best learning experience: DIY refinishing of the hardwoods

Tedious and messy? Yes. But a great learning experience and the result is amazing.

Favorite DIY project: Capiz shell pendant

I still am so happy I made this. The impact it makes in our little dining nook is amazing. It completely elevates the space to something special, rather than just an extension of the kitchen. Which is what it really is!

As a thank you to all of you for sticking by me during the good, the bad and the sometimes very ugly of projects, I wanted to do a give away! If you've been reading for awhile you know that I only do give aways once a year -- in December as a thank you/happy holidays. So this year, I have a fun give away as a thank you/happy 500th/happy holidays! So, in both the spirit of the season, and to THANK YOU awesome readers and friends (!), I have a little gift to give away: a $50 gift card to West Elm*.

So, the rules:
What: A $50 Giftcard to West Elm
How to enter: Please leave a comment on this post and your email info, and let me know:  
What is your favorite holiday song?? 
When: I will announce a winner next Wednesday, the 5th. 

Happy Monday friends! 

*West Elm has NO idea who I am and is not sponsoring this post. I'm just doing this because I like you all!