
Hello friends! As of Abi's post on friday, my {fall favorites} series is officially over! Did you all enjoy? I loved, loved, loved learning what everyone likes about fall. And, I just have to thank all my lovely and talented guest blogger friends one more time -- not only did they get me through a much needed long vacation, but they were a life savers in the first couple weeks of my new job. Thanks friends! :)
But at this point, I think I've kept you waiting way too long for a kitchen update! Let's talk about the kitchen floors today. Maybe some of your remember a few months ago, I posted about options for painting the floor. You can reread the post here, but to summarize, the original hardwoods were covered by two layers of linoleum and the blackest of black glue, applied heavily in the 1920s. Painting the floor was an idea that would allow us to work with what we have and we asked you all to vote on painted floor colors. To date, this was by far my most controversial post. So many of you commented to vote on a color, but just as many commented to tell me NOT to do it. To take the extra amount of time to finish sanding. Or to just install a new floor over it! The post caused me a considerable amount of pause. I trust your opinions and we've worked so hard on the kitchen -- I didn't want the floor to ruin the space!
But at this point, I think I've kept you waiting way too long for a kitchen update! Let's talk about the kitchen floors today. Maybe some of your remember a few months ago, I posted about options for painting the floor. You can reread the post here, but to summarize, the original hardwoods were covered by two layers of linoleum and the blackest of black glue, applied heavily in the 1920s. Painting the floor was an idea that would allow us to work with what we have and we asked you all to vote on painted floor colors. To date, this was by far my most controversial post. So many of you commented to vote on a color, but just as many commented to tell me NOT to do it. To take the extra amount of time to finish sanding. Or to just install a new floor over it! The post caused me a considerable amount of pause. I trust your opinions and we've worked so hard on the kitchen -- I didn't want the floor to ruin the space!
Chris and I talked about a bunch, but in the end we decided to proceed with painting. So, guess what I did in the two nights leading up to us leaving for Italy? Pack? Psssshh. I painted our floor!

I want to share our reasons for painting with you.
1. I've always wanted to paint a wood floor. I just like the look a lot! (I actually wrote a post about painted floors way back in 2009). Chris agrees with me and we decided that in our house, this is the best space to try painted floors.
2. The floor really was terrible. Like, really, really terrible. So many of your encouraged me to keep sanding. But realistically, even if we took the ridiculous amount of hours it would've taken to sand the entire floor, it was never going to look as good as the rest of our wood floors. The dark black glue was leaving dark stains on the wood. Since the kitchen is now such a focal point in the house, these dark spots would've been very obvious. And ugly.
3. We can always go back and recover later. We both decided that if we painted and hated it, or even, painted and grew sick of it in a couple years, we can always go back then and add bamboo, or marmoleum or whatever. We wanted to at least give painting a try first.
Now about that color. Many of you commented that you'd actually paint the floor a darker grey. And, you guys were so right! In fact, the stairs to our back entry are grey and its a grey we really like, so we decided just to continue that grey into the kitchen.
Want to see how we did them? We have lessons to teach you friends. Mistakes were made. Oh, and if you don't care about the method, there are more pretty pictures at the end of the post :).
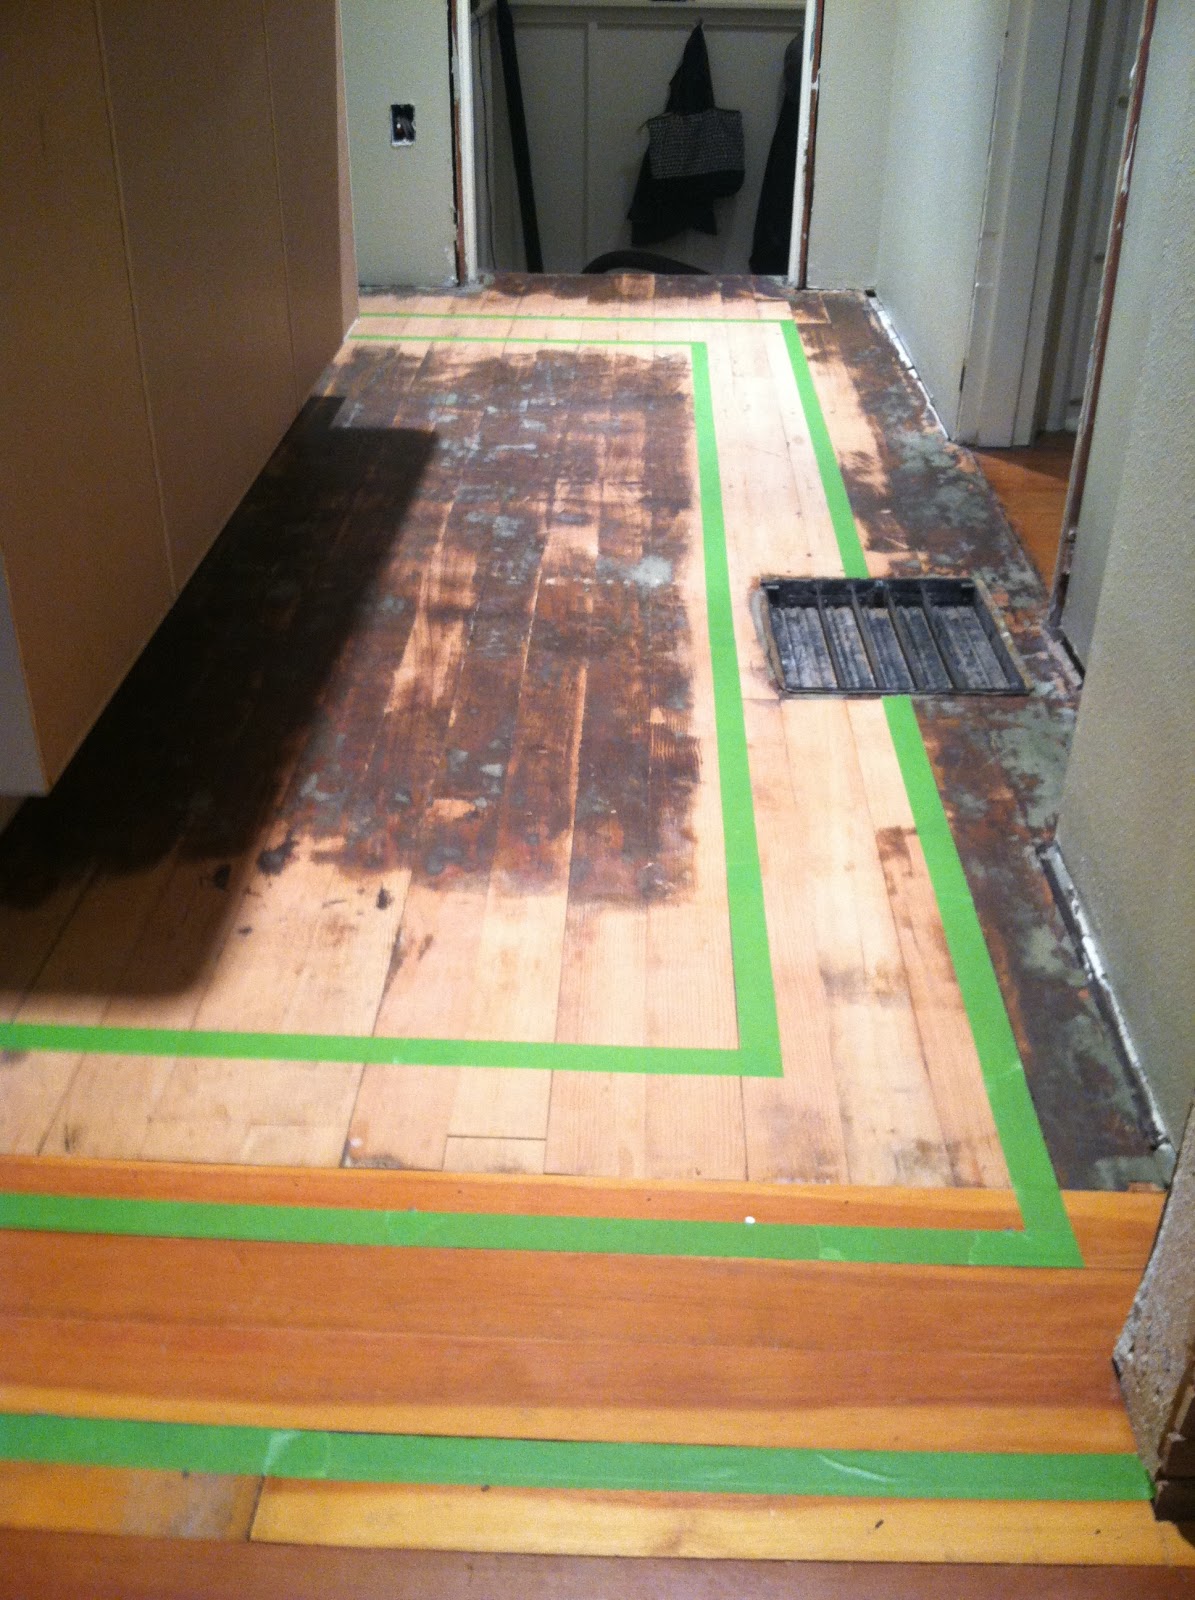
First, we taped off the pattern we'd roughly sanded in. Here's where I get really nervous. Remember when I learned that really awesome trick for making super clean lines (click here to see my cleanly striped hallway)? Well, that trick requires two different paints -- you can't "seal" tape lines if you're your stripe is actually natural wood. Cue intense nervousness from the worrier (me!). I made sure the tape was pressed down as hard as possible :).

Next came primer. And here's what the first coat looked like. Panic much? Yeah, there was some panic. Because, ugh! Crackle, while a lovely throw back to 1985, is NOT the look we're going for.
At this point I should probably tell you that we had a professional hardwood floor company come in to give us a quote about pulling up the linoleum and refinishing the floor. I should also tell you that it was against the law for them to touch it because of how old the first layer of linoleum is. Apparently old linoleum glue = super hazard chemicals = can only be removed by specialists in white puffy suits in a sealed off room. In a nutshell, having professionals re-do our hardwoods would've cost more than the entire kitchen remodel!
So back to that first coat of primer. Of course I grabbed a can of water-based primer. I really hate oil-based anything -- it's so hard to clean up. This lazy attitude was SUCH. A. MISTAKE. Friends in old houses, if you are planning on sealing off anything that is old, has remnants of glue or old paint, please you an oil-based primer. Thank you for learning from my mistakes.

After the first layer was dry, I crossed my fingers, sanded the entire thing and painted coat number 2. Which didn't crackle as a bad, but still. At this point, we were leaving for Italy in two days and we needed to take a huge chance and add paint. Cue more nervousness.


Here's where I admit we got so lucky. The paint didn't crackle! We used Behr Premium Plus Porch and Floor Paint, which is super thick and amazingly tough paint (our back stairs, which we use approximately 50 times a day, still look perfect two years later).

And here's where I have to tell you that I've received no compensation from Frog Tape - although I probably should be ;)! - for the glowing review I'm about to give you. I pulled up the tape as soon as I'd painted the second coat, when it was still a little wet. Friends, the line is PERFECT. OMG! There is not a speck of paint seepage anywhere in the kitchen. I didn't apply the tape in any special way - just made sure that it was pressed down really good - the result is complete perfection. Thanks to Frog Tape for helping to create a beautiful kitchen floor. If the tape had allowed seepage, this would be a very different blog post. And there would've been tears :).

I know it might not be everyone's cup of tea, but we LOVE it. The whole reason we decided on a stripe of wood around the room was to create a flow between the living room and the kitchen. It achieves this perfectly. And, as you can see, the nook in back is a solid grey. When you walk in our front door, you see hard wood, transitioning to partial hardwood/partial painted, transitioning to totally painted. It looks like a planned design element, instead of an attempt to hide a horrible wood floor. Ahem.


I still need to coat the floor with a couple layers of polyureathane, which will make the wood really pop. That'll be happening this week!
I know this remodel seems like it's taking forever (because it is!), but we're so close. We're finishing up the island (update soon!) and then we just have trim and tile. See? CLOSE. There's an end in sight an this makes me very, very happy :).
Happy Monday friends!


