Showing posts with label Chocolate. Show all posts

2.13.2013

{create} chocolate bowls


Have you guys ever made chocolate bowls? I used to make them all the time when I was younger - I'm pretty sure I found the recipe in a Martha Stewart .... back before the internet (gasp!). For some reason I was remembering that the other day, so I whipped up a batch to take to a friends house on Saturday night. They also happen to be a perfect treat if you're looking to make something super easy, and yet completely impressive, for Valentine's day! 
1. You start with a 12 oz bag of chocolate. I used dark and white and then got all wild and crazy at the end and combined them :). Melt the chocolate and let it cool off a little. Put a teaspoon-sized dollop of chocolate on parchment covered baking sheet.
2. Wash your balloons and blow them up to be 4-5 inches in diameter. The key here is to by small balloons -- they'll blow up thin and be easier to pop and pull out at the end. Dip your balloon in the bowl and rotate to get chocolate up the sides.
3. It won't be perfect - but I actually think that's part of the charm.
4. Set your chocolate-covered balloon on your dollop. The dollop give the balloon a place to sit.
5. Continue making your bowls until you're out of chocolate - or balloons :). Put them into the fridge for at least 30 minutes to harden up.
6. Very carefully, pop the balloon. If the pop is too harsh, you risk cracking the bowl.
7. Deflate the balloon and then very carefully peel out of the bowl.


We filled ours with chocolate hazelnut ice cream, whip cream and of course sprinkles - our friends kids LOVED them. But, they could be filled with anything -- I've filled them with pudding, used them to hold other candy at parties - get creative! 

Friends, what - if anything! - are you making for Valentine's day dessert??

4.13.2011

{create} chocolate peanut butter tarte

First off, thank you for all the sweet comments about my chalkboard vases! I keep moving them around the house because they look so good everywhere :). And along this line, I created a DIY project gallery this week! I've been wanting to do this for awhile. It's the spot to go if you'd like to make any of the projects I've posted here. I'll be updating it with all upcoming projects as well.

At some point, I'll make gallery for recipes also. Or, I guess baked goods would be more accurate! New here? I LOVE to bake. And today I'm going to have to demand that you drop everything and go make this recipe. It's that good :).

I've mentioned before that we're a gluten and dairy free household, but we're secretly in denial. We don't want our food (especially our desserts!) to taste gluten or dairy free. What's the fun in that? So it's my mission to find recipes that are amazing and everyone will love. This recipe had me a chocolate peanut butter. Uh, hello classic delish combo.

I first made this recipe one night when we had my parents (the ultimate test) over for dinner. They LOVED it. So we made it for friends. Who, of course, loved it. But it was when my dad requested that I make him this tart, instead of a traditional birthday cake, for his birthday last week, that I knew it was time to share it with you guys.


Chocolate Peanut Butter Tart
Adapted from Healthy Indulgences

Ingredients:
Peanut Butter Crust
  • 1/4 cup crunchy natural peanut butter
  • 2 tablespoons unsalted butter
  • 2 tablespoons beaten egg
  • 1/2 teaspoon pure vanilla extract
  • 1 cup blanched almond flour, packed
  • 1/2 teaspoon baking powder
  • 1/4 teaspoon sea salt
  • 2 tablespoons honey
Chocolate Filling
  • 1 can full-fat coconut milk
  • 4 tablespoons honey
  • 1/8 teaspoon sea salt
  • 3 tablespoons cocoa powder
  • 4 oz semi-sweet chocolate, chopped or chips
  • 1 teaspoon pure vanilla extract
  • 4 tablespoons organic unsalted butter
  • 3 egg yolks
Method:
Peanut Butter Crust
  1. Preheat oven to 275 degrees.
  2. Melt peanut butter and butter in a heat proof bowl. 
  3. Stir in vanilla, egg and honey.
  4. Add dry ingredients and stir to form dough. It'll be sticky.
  5. Press the dough up the sides of a 9" tart pan.
  6. Bake for 20 minutes. At 20 minutes, turn off the oven and do not open the door. Leave until ready to assemble.
Chocolate Filling + Assembly
  1. In a medium saucepan, heat 1 1/4 cup coconut milk, honey and salt and simmer on low.
  2. In a separate bowl, whisk together the rest of the coconut milk and cocoa powder. This helps the de-clump the cocoa powder. Add the mixture to the saucepan.
  3. In another separate bowl, separate the egg yolks, and slight beat with a fork. Add 1/2 cup of the warmed coconut mixture into the eggs, whisking constantly and then add the egg mixture back into the saucepan.
  4. Keep whisking. Cook for 3-5 minutes over medium-low heat stirring until mixture coats the back of a spoon.
  5. Remove from heat and stir in vanilla and butter until butter is melted.
  6. Remove your tart shell from the oven, and pour chocolate filling in almost to the brim. 
  7. Cool tart uncovered in the freezer until the top becomes firm. Transfer to the refrigerator and cover with plastic wrap.
Note 1: When you get to the assembly step, you will have filling left over. This is a very good thing. You can do two things. 1. Pour into ramekins or muffin tins and freeze for snacks. 2. Pour into ramekins and put into the refrigerator for pudding snacks. Either is awesome.

Note 2: This dessert is best accompanied with Bailey's. Be warned though: this is not for the weak of heart. :)

I learned this weekend that my aunt doesn't like chocolate/pb combo? What you say? Yes, we all said that too. So my question for you is: what's your favorite chocolate combo? What's your least favorite combo? Mine: I LOVE chocolate mint, but HATE chocolate/fruit anything. :)

10.13.2010

{create} pumpkin brownies

I really love fall. I love the crisp mornings, the leaves changing color, the squashes at the farmers market and the sweaters and boots I get to dig out from their summer hibernation spots. I also love baking in the fall. See, I miss baking in the summer. Since our house isn't air conditioned, turning on the oven in our house isn't an option in the summer. So upon the first hint of that fall crispness, I get an itch to bake again.


The first thing I made this year? My favorite pumpkin brownies. I ran across these a couple years ago and was hesitant. I'm a chocolate purist and I really don't like chocolate mixed with fruit, so why would I like it with pumpkin? But, I found the recipe on Smitten Kitchen and thought it sounded interesting.


And interesting it was. In fact, these brownies are quite fantastic and completely reminiscent of fall. They are also very near and dear to my heart because they are the first recipe I converted to gluten free on my own. They converted so seamlessly, my family couldn't even tell I'd switched up the recipe. And that, my friends, is a success.

If you'd like the original recipe, you can find it here. The recipe below is tweaks, including the conversion to gluten free.

Pumpkin Swirl Brownies

Ingredients:
  • 8 tablespoons butter, plus more for pan
  • 6 ounces bittersweet chocolate, chopped
  • 2 cups gluten free all-purpose flour
  • 1 teaspoon xanthan gum
  • 1 teaspoon baking powder
  • 1/2 teaspoon salt
  • 11/4 cup sugar
  • 4 large eggs
  • 1 tablespoon pure vanilla extract
  • 1 1/4 cups solid-pack pumpkin
  • 1/4 cup vegetable oil
  • 1 teaspoon ground cinnamon
  • 1/4 teaspoon ground nutmeg
  • 1/2 cup chopped nuts (optional)
  • 1/2 cup chocolate chips (optional)

Method:
  1.  Preheat the oven to 350 degrees. Butter a 9-inch square baking pan. Cut a length of parchment paper that covers the bottom. Line the pan with this and then butter. I love this trick. It makes removing baked goods so easy.
  2. Melt chocolate and butter in a double boiler (or a heatproof bowl set over a pot of simmering water). Stir occassionally.
  3. Whisk together flour, xanthan gum, baking powder, and salt in a large bowl; set aside. 
  4. Put sugar eggs and vanilla into a large bowl and beat with an electric mixer until fluffy and well combined. This will be about 3 to 5 minutes. Beat in flour mixture. Don't over beat.
  5. Pour about half the batter into a separate bowl and stir melted chocolate mixture into it. This mixture will be super thick. Add a few tablespoons more of the batter until it is pourable. If the chocolate mixture is too thick, it will be hard to swirl the layers later.
  6. In another bowl, stir in the pumpkin, oil, cinnamon and nutmeg. 
  7. Transfer half the chocolate batter to prepared pan and smooth the top with a rubber spatula. Top with half the pumpkin batter. Repeat with each.
  8. With a small spatula or table knife, gently swirl the two batter to create a marbled effect. Sprinkle with nuts or chocolate chips, if you'd like.
  9. Bake 40 to 45 minutes, or until set. Let cool in pan on wire rack.
  10. Enjoy!

8.04.2010

{create} birthday cake

Happy birthday to me! 


I love birthdays ... aren't they the best? In honor of my special day, I thought I'd share a completely amazing birthday cake recipe. This cake isn't actually for my birthday -- but don't worry I have a fantastic dessert planned for my party this weekend and I'll share it soon. I made this cake for Chris' birthday a couple weeks ago. 

Fun fact: Our birthday's our two weeks to the day apart. When we got married my parents tried pulling a joint birthday party for us. They should know me better than that! I love Chris, but I do not share my birthday with anyone :).


I found this recipe on the Spunky Coconut* awhile back and I'll admit, I was completely intrigued. I make a seriously awesome black bean brownie, so I was itching to try beans in a cake. Chris' birthday was the perfect opportunity! And guess what? It passed the test. You know, the *your-family-is-not-gluten-free-and-is-completely-nervous-about-all-your-crazy-gf-concoctions* test.

Friends, my family loved it. I didn't tell them what it was made of -- I'm not sure they can handle the truth -- and no one was the wiser.


The best part about this cake though? It isn't full of nasty, empty-calorie ingredients. In fact, it's so jam-packed with fiber and protein, I didn't feel at all bad when I had it for breakfast the morning after Chris' party. :)
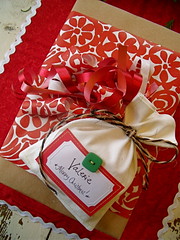
Vanilla Layer Cake

Vanilla cake:
Makes two nine-inch layers

Ingredients:
  • 4 cups cooked white beans, room temperature
  • 12 eggs
  • 1.5 tsp. vanilla stevia
  • 2/3 cup honey
  • 1/2 cup melted coconut oil
  • 2/3 cup coconut flour
  • 1 teaspoon fine grain sea salt
  • 3 tsp. baking powder
  • 3 tsp. baking soda
Method:
  1. Preheat oven 325 degrees.
  2. Butter two nine inch cake pans. Line bottom of pans with parchment paper. Butter parchment paper as well. Set aside.
  3. In a food processor, combine beans, eggs, stevia and honey. Puree well.
  4. Add in coconut oil, coconut flour, salt, baking powder and baking soda. I was a little nervous about the food processor capacity here, but didn't overflow (phew.). Puree well.
  5. Pour into prepared cake pans.
  6. Bake for 25-30 minutes, but check often after 20. Mine were done right at 25 minutes.

OMG chocolate frosting:
Ingredients:
  • 1.5 cups unsweetened chocolate
  • 1.5 cups coconut milk
  • stevia to taste
Method:
  1. Melt chocolate in a double boiler with coconut milk.
  2. Add stevia to taste. 
  3. Let cool until it's the consistency of frosting.
  4. Try to not eat all of it by the spoonful -- you do need some for the cake.

Finally, assemble the cake! And, of course, ENJOY!


*Recipe adapted from The Spunky Coconut. Have you checked out her site before? She's genius. I'm so excited to try more of her recipes.

7.23.2010


{reveal} landscape tips

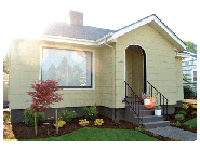
Last week I showed off our summer landscaping project. Today I'm back to give you a few landscaping tips we learned from our yard adventure. Here's the house, again, in all its cuteness:


And here are all the plants ready to go into the ground!

Landscaping tip #1: Create a color scheme. This is something I learned from talking to my gardener friends about landscaping. Color schemes help pull the look together. They can be wild and crazy or they can be monochromatic -- I've seen beautiful yards in both. As you can see above, we chose predominately white, yellow and green with pops of red. Next year I'd also like to add some oranges. Pretty much my only rule for our front yards is no purple/blue flowers. A huge bonus about having a color scheme is it will help direct your thinking when you're standing among hundreds of beautiful plants at the nursery.


Landscaping tip #2: layout your plants before digging. This one saved us and is especially important if you don't have a landscape plan to guide your digging. We repositioned our plants about a dozen times before we settled on a layout we liked. The picture above isn't even the final layout! So, please don't dig until you're happy with your layout. It's much easier to move a pot then replant.

Both these tips I did not find during my extensive online research. They were simply from talking to people. So, I hope you find them helpful as well!

I am so excited about how this will look a year from now! I'll leave you with a few detail shots:


Happy weekend!

7.20.2010


{I heart} flower bag

There's a chance this adorable bag was delivered at my door yesterday:


I am completely smitten. I have so many plans for this cute bag and am excited about how much sass it'll add to an outfit! The best part, is it's large enough to be a work bag, which for me means it has to carry files and my lunch :).

My plan was to show you the bag in all its cuteness and then direct you to the site, but I just jumped onto get the address and it's out of stock! (SOOOO glad I ordered when I did!) But, check out Ruche anyway, because they have some pretty darn cute clothes and accessories.
Related Posts with Thumbnails
Enhanced by Zemanta