7.28.2010

{inspired} loving

This week has been exceptionally inspirational. And, it's only Wednesday! I can't wait to see what's in store for the rest of the week. There are so many great things I've bookmarked this week, I wanted to share a few with you all. 

First up is this amazing paper mobile. I want to go create something with paper right now!


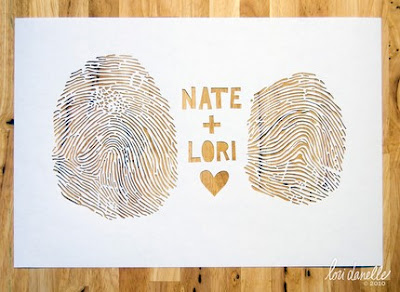
Next up are these paper cuts. Ob. sessed. I've never hidden my love of paper cuts (oh, okay, and here) and these are making me swoon hard. Now, to justify the price tag :).


And last in the loving category for this week is this wedding. Oh goodness, I don't even know where to begin! The style and whimsy are perfection. I spent way more time than I'd like to admit stalking photos from the event online yesterday.


The best part of the wedding though? Is it led me to Ashley Meaders' site. Inspiration abounds, friends. You must check her out, she is clearly one very talented lady.


7.26.2010

{create} chocolate oatmeal drops

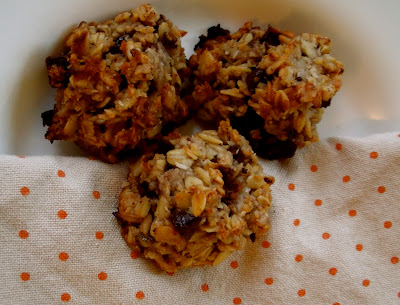
Remember when I shared with you our delicious ice cream habit? Well, the cookies I mixed are completely awesome, so I wanted to share with you also.


As with the ice cream, these cookies also use bananas as the main sweetener. And for these, you really do need to like bananas. But really, banana + chocolate + oats = a completely fantastic combination. These cookies are crazy easy and pretty crazy *healthy* as well. They're a great snack that I have never felt guilty munching on.


Chocolate Oatmeal Drops
Ingredients:
  • 3 large, ripe bananas, well mashed
  • 1 teaspoon vanilla extract
  • 1/4 cup coconut oil, melted
  • 2 cups gluten-free (or regular) rolled oats
  • 2/3 cup almond meal
  • 1/3 cup coconut, finely shredded & unsweetened
  • 1/2 teaspoon fine grain sea salt
  • 1 teaspoon baking powder
  • 6 - 7 ounces chocolate (we use unsweetened, but any kind will work)
  • A few drops of stevia (optional, but good if you're using unsweetened chocolate)
Method:
  1. Preheat oven 350 degrees
  2. In a large bowl, combine bananas, coconut oil and vanilla. 
  3. Add in oats, almond meal, shredded coconut, cinnamon, salt, and baking powder and combine well.
  4. Carefully fold in the chocolate chips.
  5. Drop tablespoons of dough onto cookie sheets.
  6. Bake for 15 minutes. Keep an eye on them though. They're done when the bottoms are brown, but not burnt.
 *Recipe adapted from the awesome 101 Cookbooks.

Enhanced by Zemanta

7.23.2010

{reveal} landscape tips

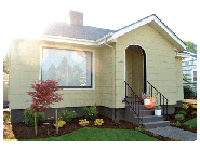
Last week I showed off our summer landscaping project. Today I'm back to give you a few landscaping tips we learned from our yard adventure. Here's the house, again, in all its cuteness:


And here are all the plants ready to go into the ground!

Landscaping tip #1: Create a color scheme. This is something I learned from talking to my gardener friends about landscaping. Color schemes help pull the look together. They can be wild and crazy or they can be monochromatic -- I've seen beautiful yards in both. As you can see above, we chose predominately white, yellow and green with pops of red. Next year I'd also like to add some oranges. Pretty much my only rule for our front yards is no purple/blue flowers. A huge bonus about having a color scheme is it will help direct your thinking when you're standing among hundreds of beautiful plants at the nursery.


Landscaping tip #2: layout your plants before digging. This one saved us and is especially important if you don't have a landscape plan to guide your digging. We repositioned our plants about a dozen times before we settled on a layout we liked. The picture above isn't even the final layout! So, please don't dig until you're happy with your layout. It's much easier to move a pot then replant.

Both these tips I did not find during my extensive online research. They were simply from talking to people. So, I hope you find them helpful as well!

I am so excited about how this will look a year from now! I'll leave you with a few detail shots:


Happy weekend!

7.20.2010

{I heart} flower bag

There's a chance this adorable bag was delivered at my door yesterday:


I am completely smitten. I have so many plans for this cute bag and am excited about how much sass it'll add to an outfit! The best part, is it's large enough to be a work bag, which for me means it has to carry files and my lunch :).

My plan was to show you the bag in all its cuteness and then direct you to the site, but I just jumped onto get the address and it's out of stock! (SOOOO glad I ordered when I did!) But, check out Ruche anyway, because they have some pretty darn cute clothes and accessories.

7.19.2010

the ugly duckling shade

Happy monday friends! I hope you all had an fantastic weekend. Ours was full of ... absolutely nothing. It was bliss. 

So as I mentioned when I revealed our landscaping, there was a reason it took me so long to show you the after pictures. You see, I spent a weekend laying bark dust (mulch? Can someone please tell me the difference?!) in anticipation of showing off my lovely new yard. That following Monday Chris mowed the lawn while I was still at work, so I set off for home to take pictures of my beautifully manicured lawn. When I arrived home though, much to my dismay, I found THIS:


Um, ew?! And yes, the first thing out of my mouth reflected *um, ew*. Friends, it's a outdoor shade. It came with the house. And my lovely husband decided to install it because ... Honestly, I'm not sure why, out of all the years he's owned this house, he decided to pull this dirty, old blind out of it's super-secret-to-me hiding spot. But he did. What's a girl to do? Well, pout of course. And not take photos of my beautiful front yard with that blindingly awful SHADE drawing all the attention. How could you possibly concentrate on the beauty of my Japanese maple, with that in the background?

And then a miraculous thing happened. Summer decided to arrive (which was miraculous in its own right!) in the NW and temperatures actually reached 100 degrees. For my little west-facing, no-insulation and no-ac home, this makes our upstairs pretty darn unbearable. The crazy part? This little ugly duckling shade pulled through in a major way and kept the house cool. And then I fell in love.

So I did a little research, and it turns out Home Depot sells these! Who knew? Okay, probably people in states like AZ. And, they come in a variety of colors:


Next year, we're so upgrading. And, most likely installing them on all the windows on the west and south sides.

So, my non-ac friends. How do you keep your casa cool in warm weather? I'm always on the lookout for new tips!

7.16.2010

{renovate} landscaping, reveal

Awhile ago I showed you our little front yard project. And then I just left you hanging. Are we done? Yep Have we been done for awhile? Oh yeah. There's actually a perfectly good reason I accidently teased you, but we'll get into that on Monday. Today, I want to show you what the yard looks like now that it's properly landscaped! 

As a reminder, here is the before:
This is what the house looked like when I moved in about year and a half ago.

Here's a mid-shot. Partway through the project, after we'd torn up the grass and sculpted the lawn:

Obviously, last summer's project -- painting the entryway -- helped immensely.

And here is now:

And from the other side:

We are so happy with how it turned out! And, I can't wait to look back at this picture next to and compare growth. I know it will look even more fantastic once the plants begin to grow in a bit. 

I'll be back next week to feature a few of my favorite plants and pass a long a few tips we learned that made the job a little easier.

Happy weekend!

7.14.2010

{create} ice cream!

What's a girl to do when it's 100 degrees in her house? Make ice cream, of course!

Last week it was brutally hot in the NW. We don't have AC. Frowny. So, we spent a lot of time in our underground cave basement. And our favorite treat in the hot weather? This bowl of deliciousness.


I actually can't believe I haven't posted this before. We lived on this stuff last summer. So I guess you're lucky -- I've had a year to perfect it! The recipe is originally from Choosing Raw, and it could not be easier. The secret ingredient is frozen bananas. Yes, you read that correctly, and please don't run just yet. This ice cream is smooth, creamy, and above all, really healthy! Even if you don't like bananas I urge you to give it a try ... it'll change your life. Seriously.

Banana Soft Serve
Ingredients:
  • Frozen banana*
That's it! But, this recipe it so adaptable. So, into the above bowl I added:
  • Almond butter
  • Dark chocolate powder
  • Chocolate chip oatmeal cookies (recipe to come)
*Quantity is completely up to you. For this recipe, I used 1.5 bananas, 1 tbsp. almond butter, 1 txp. dark chocolate and 2 small cookies.

Method:
  1. Throw frozen bananas* into your handy-dandy food processor.
  2. Let process. Scrape down the sides once or twice, as necessary. This will take a couple minutes. It will go through a process of crumbling, forming one big ball, and then it will smooth out into soft serve consistency. Make sure it's all smooth, but don't over mix.
  3. At this point it is ready to eat! Easy peasy. Does it taste like bananas? Uh, yeah. Is it cool and refreshing like ice cream. Absolutely! So, if you want to lose a little of the banana flavor, continue to step 4. 
  4. Mix-ins! I'm not sure I've made the same bowl of ice cream twice. It's so much fun to play with mix-ins! For chocolate powder or pb, almond butter, etc., add to food processor and give it a couple pulses to incorporate. For cookies and the like, mix in with a spoon after you've removed the ice cream from the processor. 
*Frozen banana tip: unpeel before freezing. Yes, I learned this from experience. Also, I like to break my bananas up into halves or thirds for better portion control.


MMMM. Easy and completely delicious. Go home and try this today ... and of course, let me know what you think!

7.12.2010

{inspire} home office

I'm having more fun designing mood boards over here. This time, I created an office. I have always loved this table. And those chairs. Oh, and that rug too. I was so excited to see how they'd all work in one space. And you know what? I love them together.


I love the pops of orange, and that chandelier is just to die for. The color is the perfect combo with orange. I have a room designated as the craft room/office. I'm hoping we get to it this fall and this board will be the launching pad for all further ideas!


**Mood board design via Olioboard.**

7.07.2010

{inspired} adorable home

I came across this home today and innocently threw the living room picture in my *inspiration* folder. And then the dining room picture. And then the den picture. At this point I realized that I couldn't *not* share this house with you -- it's a great combo of beautiful and comfortable. It looks like it's meant to be lived in, which is rare for many *inspiration* type photos.

 
I love (and have for awhile) this coffee table. I might need to find myself one of these. I also really like the one large accent pillow on the couch.

 
In the dining room, I really enjoy both the pendant light and the arrangement on the fireplace. I have a huge letter. I could totally do that with the pictures. I tend to stay away from fireplace arrangements that are too cluttered, or too *styled*. This one just makes me happy in its simplicity.

 
This blue rug is to die for. And, I'm totally smitten with the art on the left side. I would love to replicate something like this with a favorite quote.

 
I am on a huge succulent kick lately, and recently bought so many at a garage sale (random, I know). This arrangement makes me super happy and I'm itching to get mine in a cute container asap.

{All images found at the stir. This is pretty good's home.}