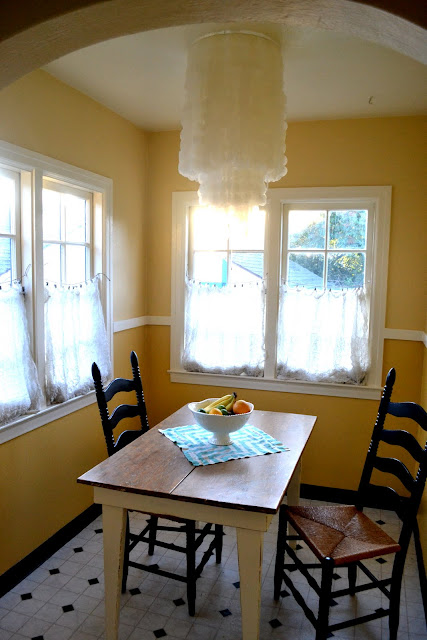
Thank you for all the super sweet comments over the last couple days about my capiz shell pendant! It really is a lovely addition to our little eating nook.
As promised, today I'm back with an insanely detailed how-to for creating your own capiz shell pendant chandelier. This project is not hard, at all, but it is fairly time consuming. I learned a couple tricks along the way, so hopefully they'll make your process go a bit faster!
Start by prepping your lampshade, which serves as the structure of the pendant. I bought a pretty nasty shade at Goodwill for $2.99. Take all the fabric off, and then add a third tier. This didn't show up in any of the photos, but basically, you want to horizontally install a wire half way between the top and bottom. I simply wrapped my around each of the vertical strips to secure as I went around. Once that's all put together, coat the entire frame in white spray paint. This might be being overly cautious, but the *capiz shells* are pretty see-through and I didn't want the frame seen at all.
Next make your capiz shells. Friends, grab your favorite movies, turn on your favorite music and (I personally recommend) grab a huge glass of wine. This is where things get a little time consuming. To make your the circles, simply lay a sheet of parchment paper on your ironing board (or on a towel on any other flat surface), lay three sheets of wax paper, and then lay another sheet of parchment on top. Turn your iron to medium heat and simply iron the wax paper together. It doesn't take long for the layers to melt and adhere to each other, but make sure you get the sides/corners really good. The trick here is that you can actually do more than one *set* of these at once. I was ironing three of these sets at once. The heat actually penetrates all the layers perfectly fine, and makes this part of the process go much, much quicker. Ironed, the sheets will look like the photo in the upper right. At first I was annoyed about any perfections the ironing caused, but then I realized these imperfections give the shells a lot of character. Love that!
For punching out the circles, I purchased a 2-inch hole punch at Michael's. It worked like a dream. I found the easiest, and fastest, way to punch holes was the fold the paper, the hot dog way, into fourths, and then punch along that line.
Now how you approach the project from here is up to you and your style of working. Some people might want to punch out all the shells before they begin sewing them together. I thought that sounded completely monotonous, so I punched some and then sewed those together, punched more, sewed more, etc.
Regardless of your process, once you punch out the circles, sew them together using a chain stitch: simply thread the circles through the machine one after the other so their is no space in between. I tried this using white thread and clear thread. You could see the clear thread just as much as the white thread, so it's definitely not worth using clear (it's so hard to work with!).
A successful chain stitch will look this this, above. I chose to do 22 circles for each strand.
After you've sewn your strands, it's time to start putting the pendant together. Simply drape your strands of circles over each horizontal row on your frame. When each strand is draped, there will be 11 circles on each side of the frame.
And, just to give you an idea of how many strands/circles my light needed ... I counted for you! I thought it'd be helpful because I had NO IDEA how many circles this would take. My frame is 14 inches at the top (widest opening). In total, I made 120 strands to get as few holes as possible and the fullness I was looking for. You guys, that is 2,640 circles! Remember that glass of wine I mentioned earlier? Yeah. :)
Is is worth it though? Yes. As I mentioned earlier, this is NOT hard. It's just time consuming. If you love this light, the cost alone is worth it. I ended up spending $26 for the entire pendant, and that includes the lamp shade and FOUR rolls of wax paper. Friends, the inspiration lamp at West Elm is $259.
To hang the finished pendant, Chris simply installed three small hooks in the ceiling around an existing light, and we hung the frame from the hooks. SUPER easy.
I hope this tutorial helps! If any thing is unclear, or you have questions, just let me know. Make sure you check out the tutorial on Freshly Picked for some other tips and tricks. And, if you end up making one, let me know! I'd love to see your version :).


