This weekend, after our New Year celebrations, we took it eeeaassssyy. It was completely lovely. I read, drank tea, watched movies and cleaned up all our crazy Christmas messes. Above all, though, I cleaned out my sewing room! It has been a catch-all since I moved into the house more than a year ago. Oy. Now it is clean and organized and everything has its place. So, how could I *not* sew after all that?
One of the weekend sewing projects (oh yes, there were actually a couple) was a new pillow. I have this thing (Chris might say *obsessions*) about pillows. I love them. They add warmth, comfort, and with the right fabric, personality to a room. They're also super easy to mix and match and rotate based on the season or your mood.
So I've been drooling over the pillow below for the last few YEARS. Love it. Don't love the price tag. $150. Yeah. Ouch. I've justified many crazy purchases, but I couldn't bring myself to buy the pillow. For that price. Especially because I couldn't decide if I would still love it next year.
Could a pillow have more personality?
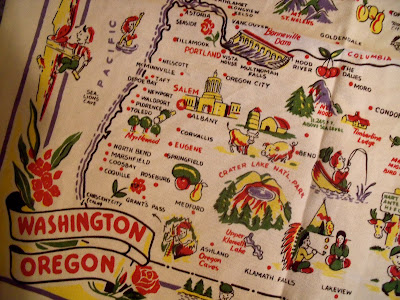
A couple weeks ago at the fabric store, I can across this:
Um hello. I immediately thought of my Oregon pillow. It's quirky and bright and fun. Just what I loved about the above pillow.
Oh and the best part? It's a $4.99 dishtowel. I didn't think twice. So this weekend I set about turning it into a pillow.
I also picked up some super cute fringe. I thought you all might enjoy a quick pillow how-to. Up until a few years ago, pillows made me nervous. How do I close them? Hand sew? Blurgh. Zipper? Really?
Then a friend showed me the greatest way to make a pillow cover. They are so easy to make and can save you so much money on a quick decor change.
First, lay the first fabric on a flat surface, right side up. Then pin your trim, if using, on top. Make sure all your trim sits inside the edge of your fabric. It will be in the correct place after you've sewn it all together.
Now for the back.This is where it gets all easy and amazing. Cut two pieces of fabric the width of your fabric. Cut one piece half the length of the pillow. This will be your bottom piece. Cut the other piece a few inches more than half the length of the pillow. This will be your top piece and they will overlap.
Lay both pieces face down on your front. Oh and btw, for the back I used scraps from my IKEA curtains. I can't believe how far I've taken this extra footage!
Next, make sure all your edges match and pin all three (this includes trim) layers together.
Now sew. Straight stitch. Make sure you're sewing all three layers. I stopped to check a few times on each side to make sure I wasn't missing the trim.
Once you've sewn all four sides, turn the pillow inside out.
Now, the right sides of the fabric will be facing out and the trim will be secure. Pom pom trim = so cute.
Now grab your pillow. Free old pillow = *love*.
Stuff your pillow into the pillow case. It's sort of like an envelope.
And, just like that . . . you have a brand new pillow! It adds so much personality to our little living room. The total cost? $8. At that price, I won't feel the least bit guilty if I hate it next year.


Awesome. Wish I had the desire to sew as I would make all new pillowcases.
ReplyDeleteLove this! I have a massive stack in my dining room of pillow forms and napkins that I want to make into pillows, but I have no idea how to sew.
ReplyDeleteYou make it look so easy. I'm going to have to give it a try!
It really is easy! Let me know if you have questions :)
ReplyDeleteAwesome! You made it look so easy!! Off to make some pillows now...
ReplyDeleteOh my gosh... Jenn... I just saw this on Pinterest and totally got more excited than one person should've over a pillow. First off, I was like "Hey... I know that gal!" and secondly, I was like "I totally made that SAME pillow!" I didn't add the cute pompoms on mine though. Bummer... they are so fun!! And it's way cuter than the $150 version. Nicely done! ~Danielle
ReplyDelete