1.31.2010

{renovate} the fireplace

I teased you all a couple weeks ago with the *befores* of my fireplace. I'm here today with the exciting *afters.* How do you all gauge when a project is successful? I deem a project successful when my husband, who has been very vocally against this project, LOVES the results.

Just a reminder of the dark, dingy and dirty eyesore before:

And, the sparkly, clean and sharp after.
 
What do you all think? It was so simple. I removed the screen and doors. Cleaned out pounds of ash and painted it the same shade of creamy white as the trim. And it has made all the difference in this room. I am still floored at how small changes in a room seem to make the biggest difference.

Want to see it again? Because I can't stop looking at it.


             {before.}                                    {after.}

And, the flowers add a sweet spring-like touch, no?
 

Happy Monday to you all!

1.29.2010

friday {love}

I learned the coolest new thing this week friends.


You can force tree cuttings to bloom! Am I the only person who didn't know this? I put these twigs in my paper whites to help them stay straight, and was so surprised when they budded. So when the paper whites died (frowny) I threw the twigs in water and sure enough, they bloomed this week.  


They make me so happy. Next year, I'm collecting cuttings for this purpose alone.

I hope you all have a relaxing and inspiring weekend!

1.28.2010

{inspire} felt flower wreath

Just ran across this and had to share. How amazing is this wreath?


Swooning big time right now.
And, there are directions if you want to give it a try! Here.


 **found at Purlbee via bloesem**

{create} curtain how-to

I'm back with a quick *how-to* make a curtain. This is so, so easy. Like I mentioned before, for me the hardest part of this process is always picking out the fabric. Too many cute fabrics to choose from!


One. Measure your window.

Two. Measure your fabric, taking into account seam allowances. I left a half inch on each side. I didn't measure for allowances on the top and bottom, because I like to hem once everything else is finished.

 
Three. Sew your sides. Fold the side over half an inch and pin. I also like to iron the seam here. It just makes it easier to sew. Then, sew a straight line to secure the seam.

 
Four. Sew your top. I wanted a little fabric above the rod. So, first I measure the rod space - one inch - and then a doubled it. So I folded over two inches, pressed, pinned and sewed into place.

Five. Rod space. To create a spot for the rod that was secure enough to bunch my fabric, and leave fabric above the rod, I cut the space in half and sewed a new seam. This left me with two one-inch spaces at the top.

 
Six. Hem the bottom. I actually hang the curtain from the rod at this point and physically measure how long I want the curtain to hang. I then pin it before taking it off the rod. As you can see above, I created a clean edge on the bottom, before I hemmed. To do this (it creates a cleaner look on the back), sew a quarter-inch seam and then fold the fabric for your hem, press, pin and sew. To leave less lines, and create a cleaner look, I sewed my hem line along the same line as my quarter inch seam.

 
 {Final hem}

 
Seven. Hang your curtain. Step back and admire you handy-work and revel in just how easy it was to create a custom piece for your home! If you remember, I actually ended up not really liking this curtain. So, I created a new one.

Two (a). If you want to add painted stripes to your fabric, go back to step two. Measure out your fabric. You want to paint before you sew, so you don't have any wonky paint lines later. Yes, wonky is the proper technical word here.

 
Two (b). Tape off your fabric into stripes. Make sure the tape is really secure. You don't want leaks.

Two (c). Lay the taped fabric on a very flat surface and spray paint the not-taped spaces. I ended up doing two very light coats of paint. I also let it dry overnight, but this was just an extra precaution. It turns out that silver is sparkly all the time. I was hoping it was just still wet. Most colors will just need to dry for a couple hours.

Two (d). Once dry, return to step three and continue making your curtain panel.


I hope this gives some of you the confidence to try this on your own. Please let me know if anything is unclear or if you have any questions!

1.27.2010

question of the day: books

Let's talk.I need some insight for storing books on the floor. As a design element.

I get what people are going for when they put their books on the floor.


It gives off a more casual laid-back vibe.


And organized by color and in the right setting, these books on the floor look really cute. (see books on the right in this pic.)


But how on earth do you make this work? When I put my books on the floor, I just end up looking like a slob. Does anyone out there know the trick to making this look brilliant, rather than accidental? Or do you hate the look no matter what? Opinions, please.


**images via: apartment therapy and house beautiful**

1.26.2010

rainy day comfort

Today is a little out of the ordinary here at a home in the making. In a nod to the dreary and wet weather we've been experiencing, I wanted to share with you guys one of my ultimate comfort foods. Beef stew. I rarely eat beef, but this stew is just so good. And so perfect in the winter.

It's Chris' Grandmother's recipe. Aren't Grandmother recipes always the best? And this one is so, so, easy.

Beef Stew

Ingredients
- 2-3 Baker's potatoes
- 2 pounds stew meat, cut into 1 inch cubes (I buy pre-cubed)
- 5 carrots, sliced
- 1 large onion (I often throw in two. yum)
- 3 stalks celery, diced
- 1 28 oz. can of diced tomatoes
- 1/2 c. quick cooking tapioca
- 1 clove garlic
- 2 bay leaves
salt and pepper to taste

Directions
Layer everything into crockpot in above order, starting with potatoes.
Cover and cook on low for 10 to 12 hours, or on high for 5 to 6 hours.

That's it! We often throw it together before work in the morning. The smell that greets you upon arriving home after a long day at the office is amazing.

1.25.2010

{create} some privacy, please

When I moved into this house, with one exception, there were no window treatments. First, of course was our bedroom. Sheets are not  an okay window covering, IMHO. Next we picked out drapes for the living room. And then I got stuck. I think window coverings add so much depth and personality to a room. They are another opportunity to layer and help a room look *finished*.  But I'm putting to much pressure on myself to find the *perfect* treatment and can't seem to make a decision.

The one exception to a window treatment, that I mentioned above, was our front door.

{Oh and for those of you as ocd as me, rest assured, we have fixed the outside wreath. It's now centered. And, it's driving me crazy just to look at these old pics!}

Um yeah. Not so good. Besides just being ugly, the blinds were bent and dirty beyond cleaning. I needed something - anything - to replace those. How hard can making a curtain panel really be?! You guys, not hard at all.

So I went to the fabric store, determined to not leave until I had fabric. And, I made a panel.


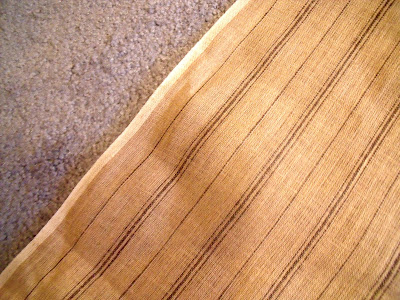
And I couldn't figure out what I didn't like about it. I know it's hard to see with the light behind. Here's a close-up:

It's a little bit . . . country/americana. We are not going for country in the living room. Or the house for that matter. And, it was a little dark for the space. I was back to square uno. I still had remnants from the living room IKEA curtains though, and with a little prep they became my new curtain panel.

I painted the fabric. Silver. Because that's the only spray paint I had in the house.

And really, it's exactly what I was looking for. It cost nothing. And, the first curtain was just moved to the back entry. Perfect!

For those interested, I'll do a quick curtain panel tutorial later this week for those interested. 

1.22.2010

friday {love}

Happy Friday friends!


I hope this weekend you make the time to do something you love, for you.


**image via simple effulgence**

1.21.2010

{inspire} restorations

In real life I have the opportunity this spring to work with two very amazing properties here in Oregon. I'm inspired every time I visit, and hope they'll inspire you too!

The first is the Cannery Pier Hotel. Formerly a working cannery, it's now a beautiful hotel. With completely amazing rooms. I love that they took a dilapidated historic building and turned it into a destination.


And who could overlook the jaw-dropping views of the Columbia River? In every room. Love the chairs, and the rug. The rooms are designed with the beach in mind, without being over the top cliche *beachy*. The colors are soothing and pull from the views.


 The bathrooms are to die for. I'll take a glass of wine, this tub and the view right now, thank you.

Next door, is the Loft at the Red Building. And, I might ask, where was this when I was planning a wedding? This building is perfection. And not just because of the views. Although, those don't hurt.
Also a former run-down cannery, the building has been beautifully restored.

Just look at the wood. And the exposed ceilings. And ooh. Those floors. I drool each time I walk in.

This, my friends, is an amazing lesson in conservation and restoration. The results speak for themselves, and I wish more people would restore old buildings, rather than demolishing. This world would have that much more character, don't you think?

1.19.2010

recycled flowers

Has anyone seen the new Anthropologie window displays? *Love!*
I'm totally diggin' the floral spring vibe. Plus, they're made from recycled materials! As always. So creative.


I'm sure I'll have to check out their new spring line window displays soon. Such fun!

1.18.2010

{renovate} the closet

Last month I showed you the big reveal of our bedroom. What I purposefully left off was the closet. My closet. It is home to a window that someone, somewhere along the way, covered with wood. From the outside you can't even tell it's a window. It's pretty annoying. Who covers a window from the outside, but not the inside?! These are the types of really annoying house things we're dealing with here, friends.

 
{please excuse the terrible lighting. the closet doesn't actually have a light source.}
As you can see, it's just sort of a small blah space. But this is the space that holds all my lovely clothes. I really wanted it to be as amazing as the rest of the bedroom. My clothes deserve a nice home, right?

 
So I dressed up the window. It was so super easy. I just found paper I adore, cut it down to fit in both panes and added spray adhesive. Ta-da. It adds a nice dash of color to an other wise pretty dark, small space. I couldn't stop there though.

 
I was looking for a place to hang my necklaces so I added small hooks to the wood pane-divider. Now, it's a functional and adds a little bling to the closet that I just love.

 
I hope think most houses have these crazy, seemingly wasted spaces (and it's not just ours!). How are you making yours work for you?

1.15.2010

all projects have to start somewhere

And, this is where the fireplace project begins. If you've been reading this blog for awhile, you'll know that I've have strong feelings against this fireplace.

It sticks out like a sore thumb in the living room. It's a weird color. And, it is in a spot where it can't be a focal point, unfortunately. So I'm finally going to fix that. I'm going to paint it a lovely cream color and hopefully it will blend into the room a whole lot better. And yes. Chris is actually okay with this. Finally.

 
First things first. It needs cleaning. I don't even like to think about how many years this ash has been sitting there. Bleh. So that's where this project is beginning. And, this is how my weekend is shaping up.

What about all you? Any fun and great projects lined up for this weekend?

1.14.2010

purse envy

I clearly have flowers on the brain this week. But really. How cute it this bag? Great size. Great shape. Love the wool felt. Love.the.flowers.

 And insides stripes? Yes please.
 

Will now spend the evening thinking of all the wonderful uses  justifications for this bag.

**Found here**

1.13.2010

and speaking of flowers . . .

I can't get over how much I adore these paper flowers.


Perfection, in my opinion.


**via brooklyn bride**

1.12.2010

{loving} cloth flowers

A little eye candy for your tuesday afternoon.
Aren't these just darling?


*via emerson made**