6.20.2012

{renovate: kitchen remodel} drywalling

In the ongoing saga of the kitchen remodel, we moved a HUGE step forward this week. We have walls again! 

Even though we're really excited to be doing the majority of the kitchen remodel ourselves, we did hire a contractor to do the drywall. I firmly believe that even if you CAN do it, doesn't mean you should be doing. We weighed the cost vs. the amount of time it would take Chris and for us, it was worth it to pay the money. The contractors we hired sheet-rocked, taped and {lightly} textured both rooms in ONE DAY. Holy smokes! It was so fast! Chris and friends were worried it would take them a few weekends. Neither of us felt like holding the project up to save a little money.

Plus, the contractors did an AMAZING job! Seriously, I was so impressed. And even better, they were great to work with, responsive and clean. If anyone in Portland is looking for a recommendation, let me know and I'll send you their contact info.

See that hole in the wall? That's where our new oven is going! That spot was formerly an ex-ironing board that was collecting dust. Cute, but VERY nonfunctional.

In all the photos you can also see all our new can lights (!). With the white walls and the new lights, the kitchen is so much brighter all ready. I'm in love.

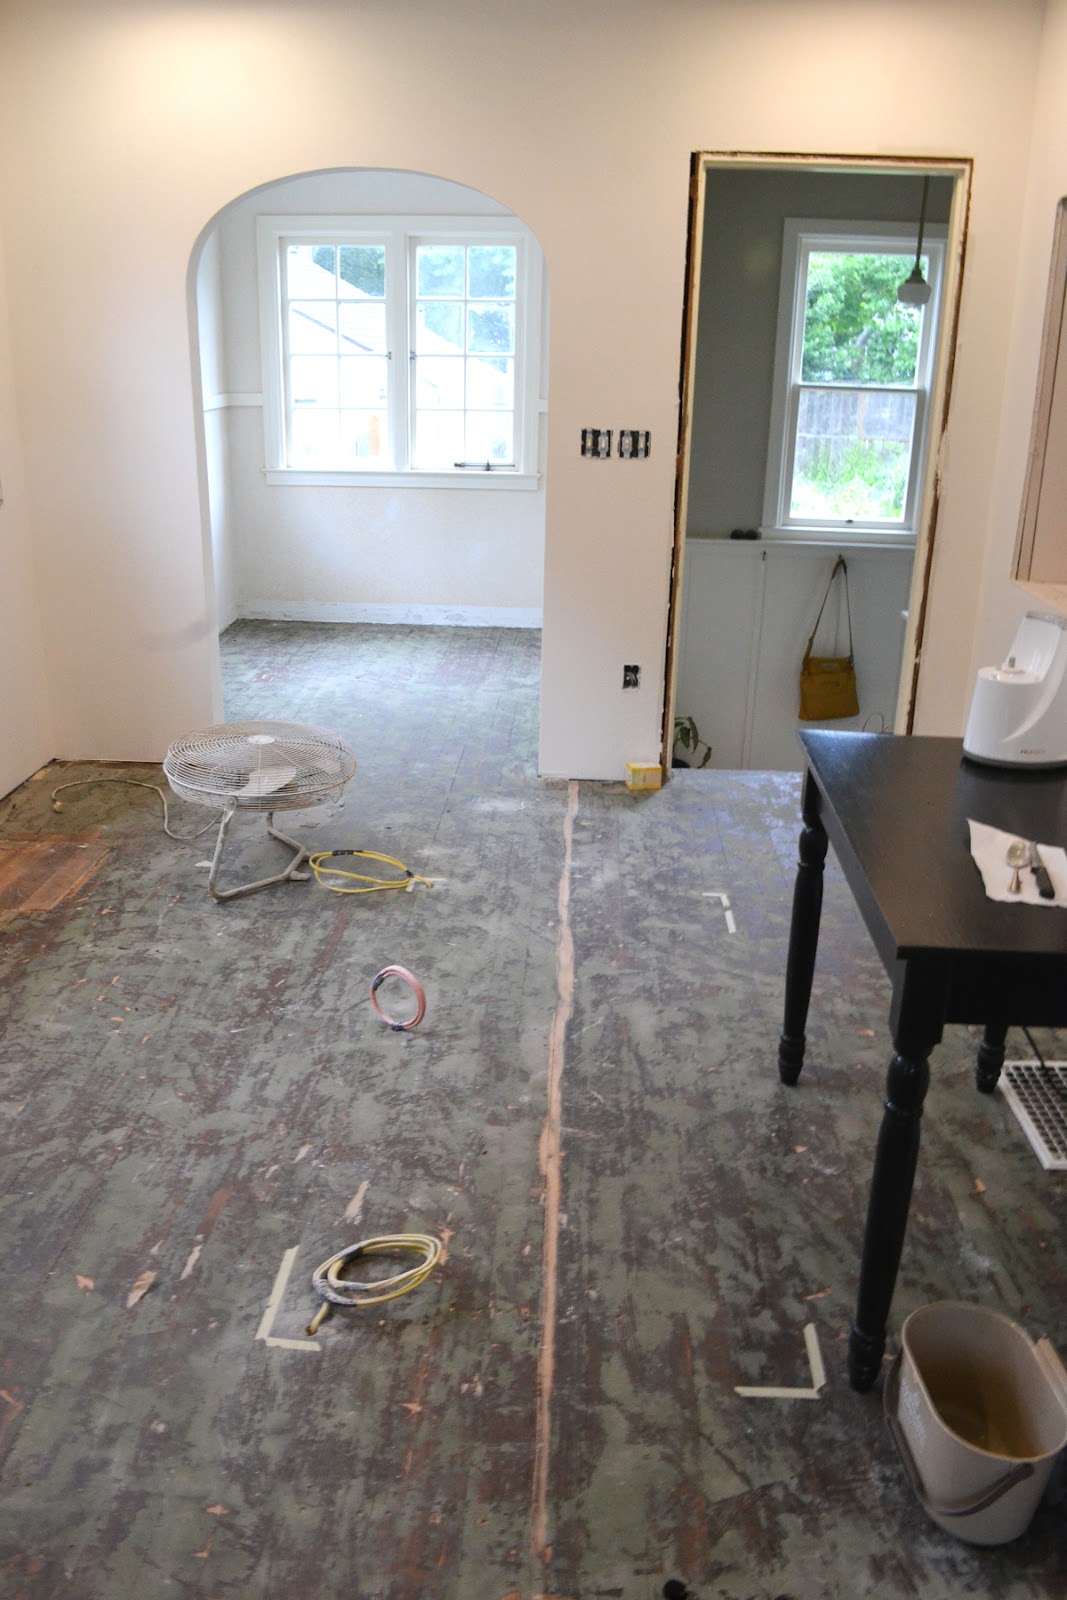
Next up, we'll be tackling the floors. I'm a little concerned, honestly, because that green paper all over the floor is super glued with the strongest super glue I've ever encountered. Hopefully we'll figure it out this weekend. I'll let you know what we come up with, but painting is quickly becoming my favorite option.


If you're just joining us and would like to catch up with our kitchen remodel, you can read all about it here: kitchen mood board here and here, kitchen issues, kitchen demo, opening up a wall and kitchen lighting plan.

6.19.2012

{create} blackberry lemon cheesecake

It's kinda crazy, but I'm getting tons of new visitors for my {so incredibly tasty} almond-butter brownies? Remember those? So, welcome! :) If you'd like to check out more recipes, there's a whole recipe tab here. 

But, the timing is interesting because I actually have a new recipe to share with you today. This is most definitely not a baking blog, but when I do love to share recipe with you when I make a particularly awesome one.

Today, I'm sharing a recipe for a blackberry lemon cheesecake.

Yummmm.

The thing is though, is that we don't have an oven right now. And, as I've talked about before, we have some crazy health issues in our house and dairy is a no-go. But, a dear friend of ours, who happened to be helping with our kitchen a couple weeks ago, was having a birthday! And, I wanted to do something special for her. So, raw cheesecake it is. Please don't click away :). Friends, keep reading. Not only was it SO EASY to put together, but it was SO AMAZINGLY good.

You start with a light sprinkling of coconut. It helps the cheesecake not to stick. Do you like my mini spring form pans? For some reason I couldn't find my big one, but I think mini-cheesecakes are adorable, so it's all good.

Pack the crust into the bottom of the pan(s).

Mmmmm. Lemon cheesecake filling.

And, the best part. Lemon blackberry topping. This stuff is amazing. And, also makes a really great drink mixer. Just sayin'. Make extra.

Here's the full recipe:
Blackberry-Lemon Raw Cheesecake.
Adapted from Roost.

Ingredients:
- 2 cups raw almonds, soaked overnight
- 1/2 cup pitted dates
- 1/4 cup non-sweetened coconut flakes
- 3 cups raw cashews soaked for three hours
- 3/4 cup fresh-squeezed lemon juice
- 3/4 cup raw honey (regular honey works well too -- it just won't be raw then, if you're concerned about that)
- 3/4 cup coconut oil
- 1 tsp vanilla 
- 1/2 tsp sea salt
- 1 bag frozen blackberries
- 2 tbsp honey
-1/4 cup juice or water
- 2 tbsp lemon zest

Directions:
For the crust:
Place almonds and dates in a food processor and mix until chopped and well incorporated. Cover the bottom of a 9-inch spring form pan with coconut flakes and pour almond mixture on top. Spread out and mold into cake pan.

For the filling:
Blend the cashews, lemon juice, honey, coconut oil, vanilla and sea salt in a blender. Blend until smooth and adjust sweetness to taste. Pour the filling on top of the crust.

For the topping:
Place berries, honey and juice or water in a blender and blend until smooth. Pour over the filling.

Place the pan in the freezer for at least three hours or overnight. Before serving, let thaw a little. It's really good semi-frozen, which makes it an excellent summer treat!


By the way, these were the conditions that I was working in. HA! Good thing it was no-bake ;). But, see how nicely the light is streaming through our kitchen windows?

Hope you're all having a great week so far! 


6.15.2012

{renovate} a behind the scenes look

Friends, I have a little behind-the-scenes and funny little video for you on this friday morning. 

Remember when we demoed our kitchen a few weeks ago? And by we, I mean Chris and his friend Jonathan? Well, it turns out they made a little video. I like to think of it as their audition for HGTV.


*If you're viewing this via reader, you need to click few to watch the video.
** Some people are having trouble viewing the video -- I apologize! It's really awesome and I'm not a savvy enough blogger to know WHY some people are seeing it and some aren't. For example, I can see it on every machine and program I've tried. Which makes it really hard to fix. But I'm sorry. Please come back and visit tomorrow for non-video stories :)

It's short and there might be a curse word or two. If you're at work, you've been warned :).

I think it's entertaining because it's my kitchen and my friend, but I hope you find it entertaining as well! Would YOU watch this show on TV?? :)

Happy friday! I hope you all have a FANTASTIC weekend!