12.31.2010

{create} an amazing 2011

Happy New Year's friends!


I've been thinking about this post all week: been thinking about resolutions and been reflecting on 2010. And I'm not gonna lie ... 2010 was a weird year. Chris and I both had some great amazing things happen personally and professionally and we both had some pretty rotten things happen personally and professionally. It was quite a roller coaster to say the least and I'm not sad to see it go. The best part of the roller coaster though? I was riding it with my best friend in the entire world. We both learned so much, and it became very clear how very blessed we are.


I was looking at my 2010 resolutions this week, and you know what? I actually accomplished almost all of these. Especially the laughing more, which was the most important one. I didn't open an etsy store (that pesky rotten personal stuff got in the way), but I'm still hoping to this year.

So, I'm looking forward to 2011 with a renewed hope that this year will rock. Plain and simple. And, while I have a long list of goals, I really only have two resolutions.

Be more spontaneous.

Take risks.

I'm not great at either. But I plan on being great at both by 2012!

I wish you all the happiest and best year in 2011! I'm excited to share the journey with you, and so grateful that you stop by here to share it with me. I truly appreciate you all! And, whatever your celebrations plans are for tonight ... I hope you have a great, sparkly night! I will be celebrating with champagne and .... bowling!


So, what are you plans for ringing in the new year? Do you prefer spending a low key evening at home (usually my first choice!), or a crazy fun party? And, what are your resolutions for 2011?


**Photos via We Heart It, except the quote. That is from the incredibly talented and insightful Notebook Doodles**

12.29.2010

{create} 2010 Top 10 Projects

Confession: I love reading all the *lists* at the end of the year. You know, the lists that each news site creates to review each and every aspect of the year. For example, on CNN right now, there's the Haiti 2010 Year in Review, 10 New Year's Resolutions Not to Make and the Worst Movies of 2010. My curiosity is piqued (especially for that worst movie list--wonder how many I saw and actually liked!). If we're counting something down, you can be sure I'm reading it.

So to end this year, I thought I'd make a list of my own. 2010 was a great year here at A Home in the Making, and I picked out my favorite 10 projects to share with you. These are the projects (in no particular order) that were the most fun to make, and/or had the biggest impact in our home.

Fireplace Makeover
Actually, if these were in order, this would still be at the top. This is by far my most favorite project of 2010. Our fireplace was such a dreary eyesore before! Now, we love it!

Painted Stripe Curtain
I like this project so much because I couldn't find fabric I liked ... so I made my own. Using silver spray paint and a scrap of white fabric, I made this curtain that adds so much personality to our living room.

Farm Table Makeover
We brought this old table back to life by removing a lot of paint and adding a little back in.

Blanket Curtains
I got a little inventive here. I couldn't find fabric I liked (again!), and found this huge ruffly blanket at IKEA one day. A few cuts and stitches later and I had breezy cafe curtains.

Coffee Table Makeover
After the fireplace, I was sold on white paint. This project simply furthered my love. My favorite part though, is grass cloth we added to the top for a customized look.

Eat. Good. Food. Table Runners
These are just so fun. And, they've already seen many dinners parties :).

Front Yard Landscaping
After a couple summers spent painting (I wish I were kidding, and am glad I was only around for one of those!), we tackled the landscaping. And, wow! What a difference a few plants made for our curb appeal. I'm excited to see them grow in a little.

State Pillow
I love this project because it's a replica of a pillow I had been lusting after for years, and I made it for a tiny fraction of what the original cost. And maintained 100% of the cuteness, of course :).

Rustic Garden Cabinet
The thing I love about painting is how quickly it turns an old piece of furniture from *ew* to *yah!*. I adore this cabinet because it is the most extreme case of this in our house. This cabinet was gah-ross.

Felt Holiday Wreath
I learned so much from making this wreath, and every single person who walked in our front door this month commented on how cute it is. Time well spent.

It was so fun to go back through my archives and see how much we've accomplished this year. Sometimes it's easy to forget. And, I'm super excited to get started on all the projects I have lined up for 2011!

Update: Crazy awesome idea alert! The Southern Hospitality blog is hosting a round up of blogger's favorite 2010 projects! So many great lists to read! I submitted this post to the group, and you can click here to see them all.

So what about you guys? What were you favorite projects this year? I'd love it if you linked to them in the comments so we can all admire! :)

12.28.2010

{create} a relaxing week

Woah. Friends, is it Tuesday? What a whirl-wind, crazy, awesome and memorable Christmas! Those the are the best kind, right? And now ... I'm tired! I actually had a few things lined up for this week, but quite frankly, I'm not up for it. I'm enjoying too much the quietness that comes when something as monumental as Christmas is over.

So today, I'm going to bask in the quiet. And in the serene. And in the relaxing. Want to join me?


How was your Christmas? I hope you all had a lovely holiday and you got everything you asked Santa for :) Let's just say Santa completely spoiled me this year. And there may be a new camera involved. What is your favorite gift received?

**updated: oops! All photos from We Heart It**

12.24.2010

{inspire} to a Merry Christmas!

Well, it's finally here! I love when Christmas arrives. It makes me feel like a kid again. :)


Of course, I wanted to let you know who won the planner giveaway. Thank you to everyone who entered my first give-away! I wish I could have sent ALL of you gifts, but this time around Angela, from the lovely blog 365 Small Details is the winner. Congratulations Angela! 

And to all of you, I wish you a very Merry Christmas. I hope you have a great weekend filled with family, friends and love. 

We'll be heading to both my family and Chris' family. We're so thankful they all live close. How are you spending your Christmas holiday?

12.22.2010

{create} sparkly gift tags

Three days till Christmas! As if you needed another reminder. :) I hope all your plans and gift-buying/wrapping is coming together well. I have a couple things before we get into the fun and quick Christmas craft of the day.

First, if you haven't already, don't forget to enter the contest for a great daily planner! The contest closes tomorrow, with a winner announced Friday morning.

Second, I realized I haven't shown you our Christmas decor yet. Because we don't do a lot of decorating and because I'm sure you're a little burnt out of Christmas decor by now, I'll just show you a quick couple pics.

A few touches of red, silver and white really set the tone and add a lot of festive-ness to our little house this time of year. 


So, we're pretty much down to the wire now, and for many that means it's time to wrap gifts! I like to add a little extra something to personalize the outside of my gifts each year. Last year, it was cute, personalized candy-filled bags. This year, I went a little simpler. Our Christmas party has me candied and baked out. Somewhere (Land of Nod, maybe?) I'd seen cute letter gift tags. So, I created letters, with my own twist of course.

My standard wrapping, for all holidays and occasions, is kraft paper, covered by a strip of cute fun paper, and ribbon. I think the sparkly letter adds a really fun and special element.

These took me all of five minutes to make. 1. Print oversized letters from whichever font you like. I think this is either Times or Garamond. I like the serifs. 2. Trace backwards onto the back of your silver paper (yes, this picture doesn't show backwards. Oops!). 3. The silver paper I used is standard weight paper, so I followed steps 1 and 2 with a thin cardboard gift box also. I think the kraft-color box really ties all the gift wrap elements together. 4. Glue the sparkly letter to the kraft letter and attached to the package!

Another fun gift wrapping trick? Paper actually makes great ribbon! I use it all the time to get fun colors and patterns on my packages. Simply cut a thin strip, and curl with scissors as you would a ribbon. It makes a nice loose curl.

The paper ribbon is easily attached with a cloth ribbon. The letter can be hole-punched and tied into the other ribbon. Actually, these would also make cute ornaments after the gift is open.


So, friends, what are some of your gift wrapping tips and techniques? I would love ideas as I tackle the remaining stack of gifts I need to wrap!

12.20.2010

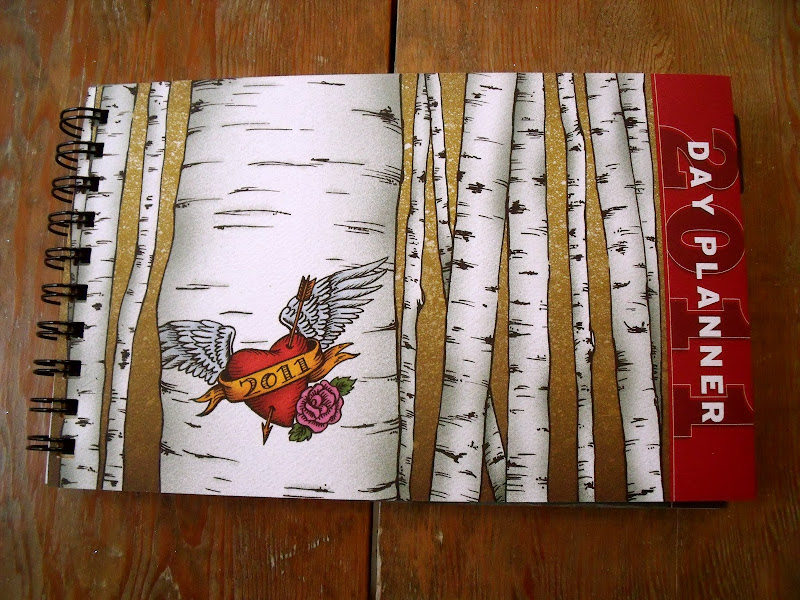
{giveaway} 2011 daily planner

Happy Monday friends!

So I've been thinking a lot about you all lately. Both your lovely and encouraging comments and how it makes my day every time someone new visits my little ol' corner of the internet. So to say both THANK YOU (!) and MERRY CHRISTMAS (!), I'm hosting my first ever (!) giveaway this week. (Woah ... so many exclamation points.)

I'm completely old school when it comes to my daily planner -- I LOVE paper. I love holding my planner in my hand, writing my lists in it, and then physically crossing the tasks off my lists when they're complete. I also think there is something so special about going back through old planners and seeing what you were doing on a certain day. Somehow seeing a simple line on a planner brings an entire day/week's worth of memories for me.

So this year I bought two planners -- one for me and one for one of you! One reader will receive the planner of their choice from the two below.

The first I found at Red Star Ink. I love it's simple, modern design. I'm a huge font geek and really like the clean font-centric cover.

There is also so much room in this for lists, and notes, and ... more lists. :)

The selling point for me though are the daily pages. So much space for appointments and tasks and to-do lists!

The second planner is from Alex Wijnen. I actually have her 2010 planner and I've really enjoyed her illustrations all year. 

The calendar comes with twelve beautiful illustrations such as this ... 

... and this awesome gnome.

There is quite a bit of room to write out appointments and tasks.

And, of course, a full month view each month.

Which planner do you like better? It's a tough choice, right?

To enter the giveaway, please leave a comment with the planner you would like and your contact info. To double your chances, blog or tweet about this giveaway and leave a second comment.

The giveaway will close Thursday, Dec. 23, and winners will be announced on Friday, the 24th. I want you to get your planner by the first of the year!

Good luck, and thank you again for stopping by my blog! :)


12.17.2010

{inspire) dessert recipes + holiday gifts

Happy friday friends! It's been a crazy week and I have a couple sort of random things I wanted to share before the weekend.

First, the recipes from our party last weekend. Because they were all so good!


The crowd favorite? The cake pops! They were such a big hit and everyone took some for the road. My favorite were the Fudge Kiss Cookies. They are dangerously rich and peppermint-y. I love that combo this time of year. The sleeper hit were the Cinnamon Star Cookies. I wanted a non-chocolate option, and these are naturally gluten free so I wanted to give them a try. They were amazing! I would make them again in a second.

And, what's a good party without a little holiday spirits?

Ingredients for a great mulled wine. Yum!

And that leads us to random point number 2 of the day. I forgot to follow up after Crafty Wonderland last weekend! I've talked about it enough ... I thought I'd show a few of the great Christmas gifts we came home with for our friends and family.

Clockwise from top: Portland pennant from bishop lennon art, Cuppie ornament from Cakespy, Letterpress print from Old School Stationers, 2011 Planner from Alex Wijnin, and a couple cute tees and onesies for the little kiddos in our family from Burdy Fly Away.

I'd been holding out on Christmas shopping until this show, and I am really glad I waited. I love what we bought, and know that it will be loved by the recipients. And, I'm excited that we supported local artists in the process! 

And of course, there's the one that got away.

There was a huge poster of this cute typewriter. We saw it at the beginning of the show and decided  see what else was there before we bought anything. Then we were tired and didn't go back. Kinda kicking myself for not buying it now. And, it's the poster version isn't on the website! Sad!

What are you all up to this weekend? I hope you have lots of fun holiday plans! Have a great weekend :)

12.15.2010

{create} dessert table

First, thank you for all your sweet comments about my dessert table! It was a huge hit at our Christmas party as well. :) While putting together one dessert table by no means makes me an expert, I did learn a lot in the process. So today I'm going to share with you what I learned and the steps I took to put the table together.

INSPIRATION 
As I mentioned on Monday, I follow the Amy Atlas blog and her site is full of great inspiration. Wedding sites are also great sources of dessert table inspiration. My favorites are bash, please and 100 Layer Cake. I gathered a few pictures that helped me understand table balance, design and details. When I got stuck planning I referred back to these for inspiration.

MAKE A PLAN
This step was a HUGE help. When I first decided I wanted to try this, I sat down and did a super rough sketch of how I envisioned the table looking and what desserts would star in the spread. The table didn't turn out exactly as I originally drew it, but, as you'll see below, it was sure close.

ROUGH LAYOUT
The weekend before the party I did most of the actual set up. I took my drawing to IKEA and found the items (such as the plates) that I didn't have on hand. Next I set everything on the table as I would like it for the actual party. This step was critical from an organizational stand point. I knew if I'd attempted this the weekend of the party, with all the baking, I would have gone crazy. It was so awesome to have all this detail work out of the way and it helped me finalize what desserts I'd make and how many of each I needed. At this point, I made the pop stands, cut branches, and covered the plates so they looked more festive. Then I snapped a quick photo so set up for the party would be super easy (and so we could actually use our table!).

SET UP
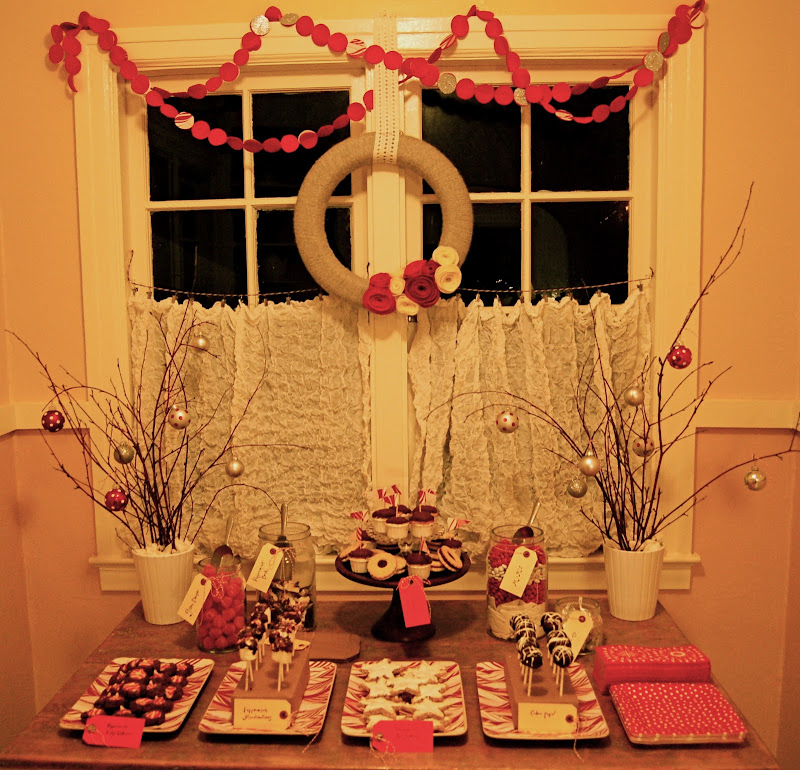
I did this early because I hate rushing around at the last minute trying to get things organized. And, I'm so glad I did. I set up the cupcakes and realized I really needed cupcake flags (obviously!), and they were much easier to make in the afternoon, rather than rushing around 20 minutes before people showed up. It was also a great opportunity to snap pics. I threw a white sheet over the window to protect from glare. Once all your treats are set out, just make sure everything is well covered so they don't get stale before the party.

RE-EVALUATE
It happens. Sometimes you get everything set up and you realize you're missing something, or it's not quite as functional as you hoped. Don't panic! Especially if you've done a lot of the work beforehand, you have time to make additions or move things around. In our case, I realized that having milk on the table, while completely adorable, would not be terrible functional for how many people we were expecting. I would have to constantly be restocking ... and not have time to chat with my friends! That's a little too high-maintenance for me, so I quickly removed the milk, rearranged the cookie plates and added cute paper plates and napkins. Much better!

(Please forgive the amazingly yellow photos here. Yellow kitchen + nighttime + lightbulb = yellow photos, even after color correcting. Eek!)

At this point, I also added little bags with a *to go* note so people would feel free to take goodies home with them.

ENJOY!
We sat back and enjoyed a glass of wine before our friends arrived :).I think this is the most important step. I used to be so uptight about throwing parties, but I've learned that if you don't relax and enjoy ... then what's the point? For me, at least, good planning is key to relaxing.

So, this is what worked well for me. Can the steps be improved upon? Sure, but all in all, these are the steps I would use for my next dessert table.

What about you guys? What are you tips for throwing a successful and memorable party? I'd love to hear what you think! 

12.13.2010

{inspired} dessert table

Do you all read the Amy Atlas Sweet Designs blog? If not, it's very worth checking out. Amy Atlas is a dessert table creator. How cool is THAT job? And, on her blog she showcases the dessert tables she's created. Friends, they are incredible. I love checking in to see her latest dessert masterpiece. And, I've loved the concept of a dessert table since I was planning our wedding.

So, I decided I wanted to create a dessert table. And what better timing than Christmas when I can invite my friends over to eat all the desserts? Oh who am I kidding, my friends would be game anytime of year., but Christmas parties are just so fun! I snapped some photos during the day (yah! light!) before the party. So, I wanted to share a few with you.


The loose (very loose) theme was cookies for Santa. For colors, I went with red, white, silver and shades of brown. Recognize the wreath? :)

For dessert, there were cookies, and cake pops.


And cupcakes galore.

There were m & m's and gum drops.


And, milk! Because what's a cookie for Santa without a glass of cold refreshing almond milk? ;)

I had so much fun creating the table. Planning the table lended itself perfectly to my over-achieving, slightly o.c.d personality. You have to work to your strengths, right?

I'll be back later this week with the steps I followed for creating this dessert table, and the recipes I used. Because they were all awesome. I'll also let you know what was everyone's favorite treat. I was a little surprised, myself!


ps. Thanks for all of you who chimed in last week with holiday song favorites! Chris and I created an awesome Christmas play list, that I listened to all weekend long and was the perfect back drop to the party.